One of the most popular and reliable computers for both home and professional use is the Apple iMac. However, they are vulnerable to damages and malfunctions. One of the most common causes is a corrupted drive that can be easily repaired by flushing the contents from its memory. There are several methods to restore your iMac to its factory settings and restore your data so that it functions as you would want it to be. Being aware of how you can do these procedures yourself will save you a huge amount of repair costs.
Part 1 How to reset iMac to factory settings?
Resetting your iMac to its factory settings is the quickest and easiest way to rectify serious problems with your iMac such as constant crashing, sluggish performance, and system errors.
Backup important data
Before you reset iMac to its factory settings, backup important data. This is because once you get your iMac to its factory settings, you will lose everything on your hard drive including your iMac's operating system and important data. Making a copy of everything you want to salvage from your iMac into an external drive or by using Apple's Time Machine feature to backup everything.

Reboot your iMac
Hold down the Command and R buttons to put your iMac into Recovery Mode.

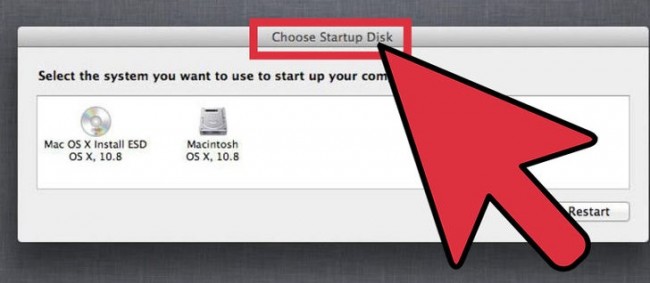
Choose the recovery hard disk
Choose the startup disk you where your recovery disk is located.
Click Disk Utility
Highlight the Disk Utility function and click the "Continue" button. Once the tool loads, you will be given a list of available hard disks.

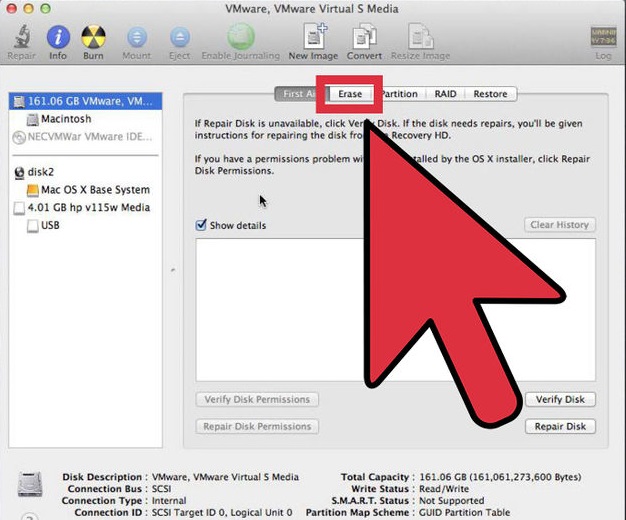
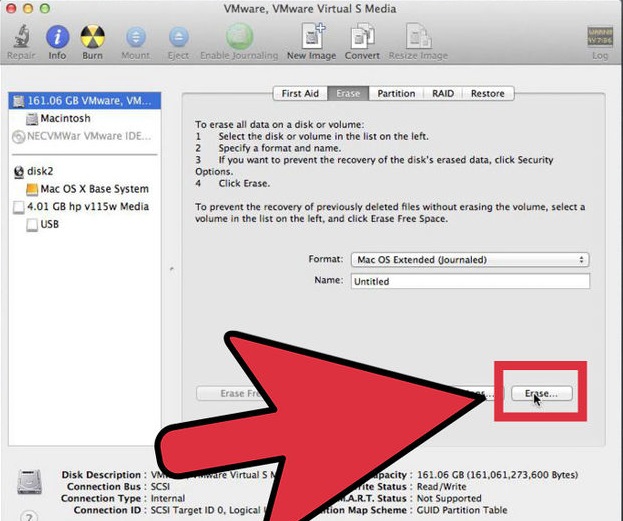
Select the Macintosh HD disk
If you have not changed the name of your primary disk, select the "Macintosh HD" disk. Pick your primary disk accordingly and open the "Erase" tab.
Select Mac OS Extended (Journaled)
From the "Format" drop-down list, select "Mac OS Extended (Journaled) which is required to reinstall your iMac's operating system.
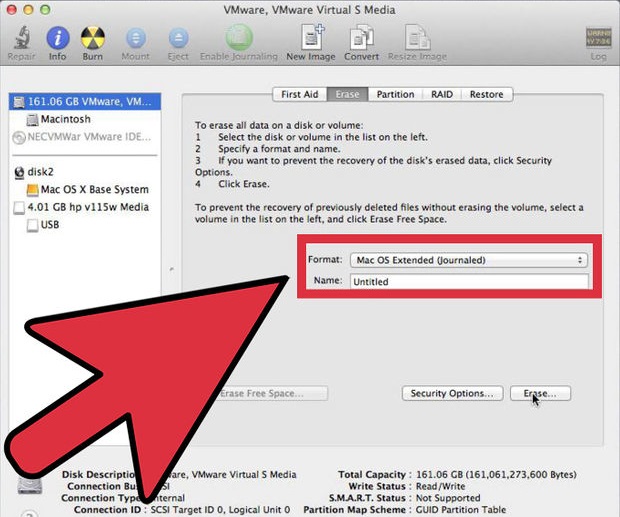
Erase everything
Click the "Erase" button.
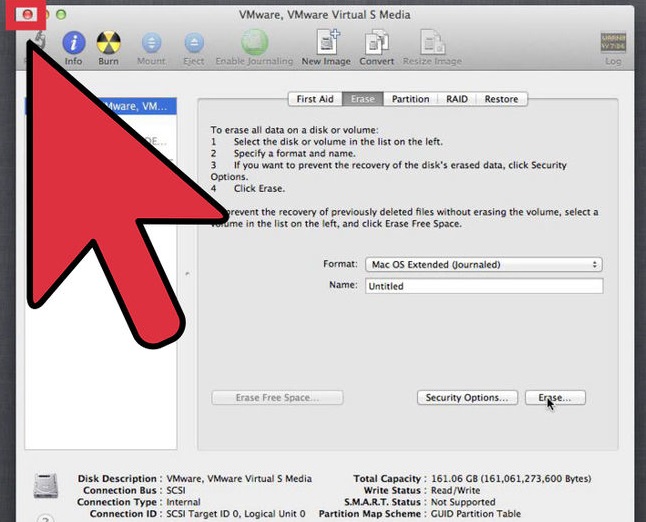
Close Disk Utility
Return to the "Recovery" menu by closing the "Disk Utility" function.
Download and install OS X
Connect your iMac to an internet connection via a wireless network. Click on the wireless icon on the upper-right corner of the screen to select an available network.

When the "OS X Utilities" window pops up, click the "Reinstall OS X" option and click the "Continue" button. The system will start installing the downloaded operating system. Follow the wizard until installation and basic setups are complete.

Part 2 How to Restore Data from iMac
The most convenient way to prevent data loss on your iMac is by using the Time Machine feature on your iMac as it is able to backup almost everything on its local drive. However, if this effort is futile, you can always opt to use a third-party data recovery software to restore data from iMac.
One of the best data recovery software you can use after restore iMac to its factory settings is Wondershare Data Recovery for iMac. You can also use this to restore data lost from virus attacks, system errors, formatting etc. Follow the steps below to start reclaiming data from your precious iMac.

- Recover lost or deleted files, photos, audio, music, emails from any storage device effectively, safely and completely.
- Supports data recovery from recycle bin, hard drive, memory card, flash drive, digital camera and camcorders.
- Supports to recover data for sudden deletion, formatting, hard drive corruption, virus attack, system crash under different situations.
- Preview before recovery allows you to make a selective recovery.
- Supported OS: Windows 10/8/7/XP/Vista, Mac OS X (Mac OS X 10.6, 10.7 and 10.8, 10.9, 10.10 Yosemite, 10.10, 10.11 El Capitan, 10.12 Sierra) on iMac, MacBook, Mac Pro etc.
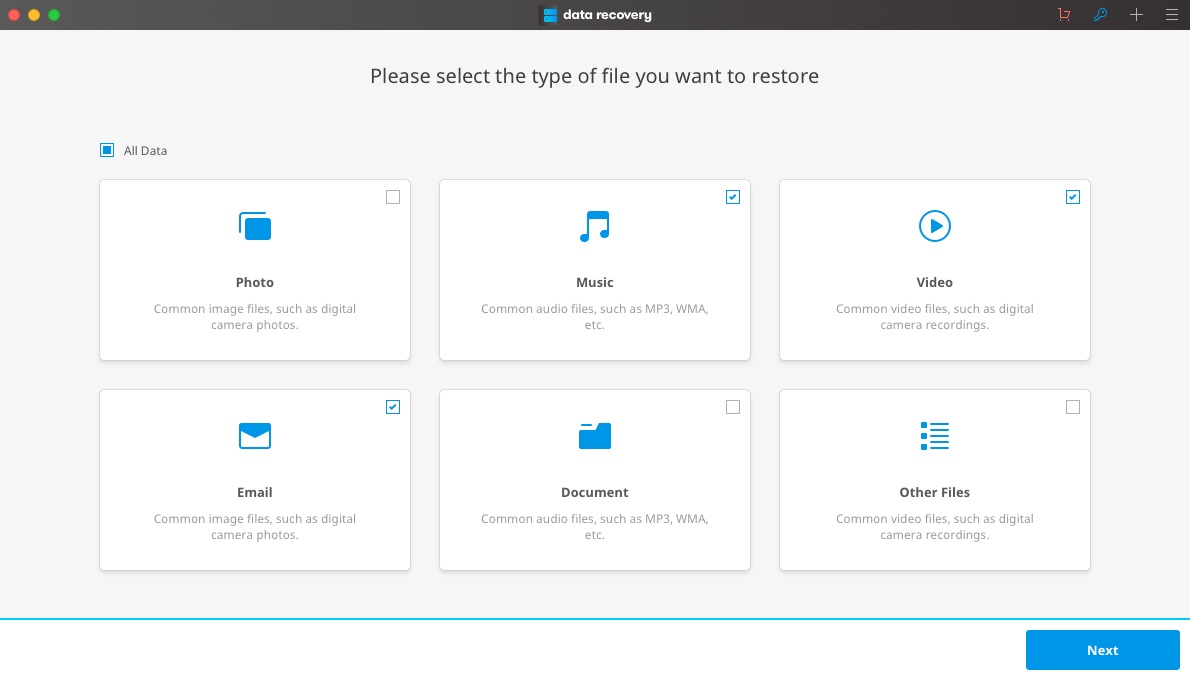
Step 1: Select a file type
To recover data form iMac, you can go to select the specific file type or select the option of "All File Types" to start
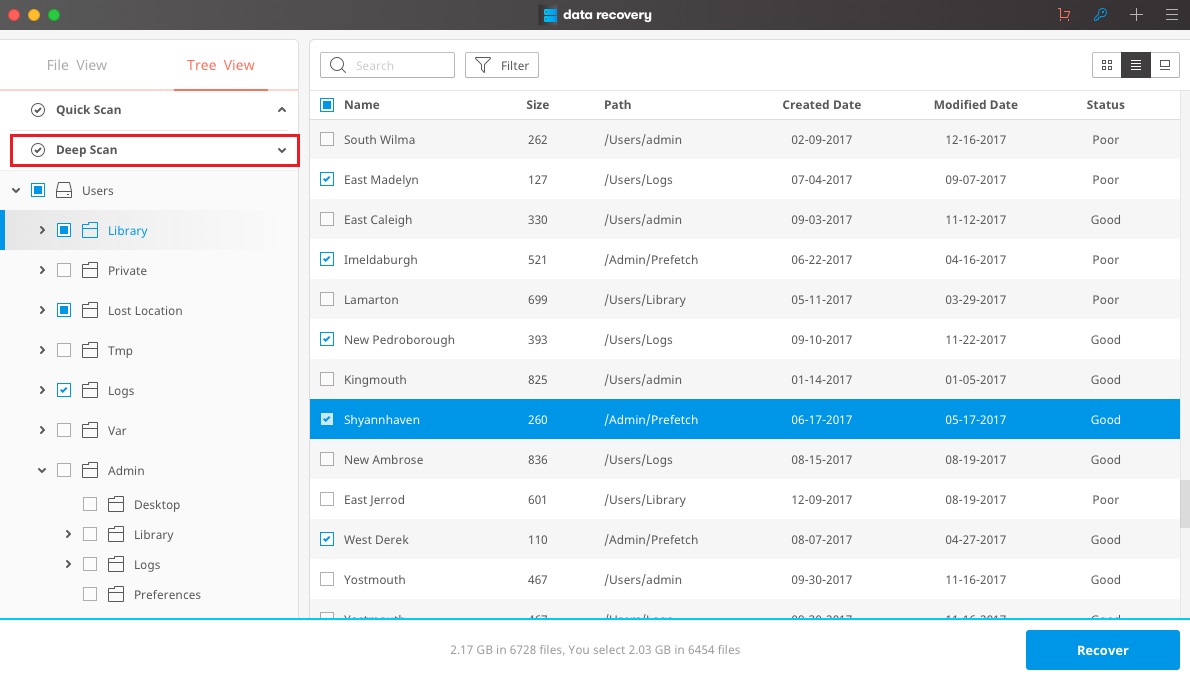
Step 2: Select the location to scanning lost files
Select the location where the original data originated from to begin the scanning process. Select "Enable Deep Scan" to enable scanning for formatted files and "Select File Type" to retrieve specific file formats. Click "Scan" when you are happy with your selections.
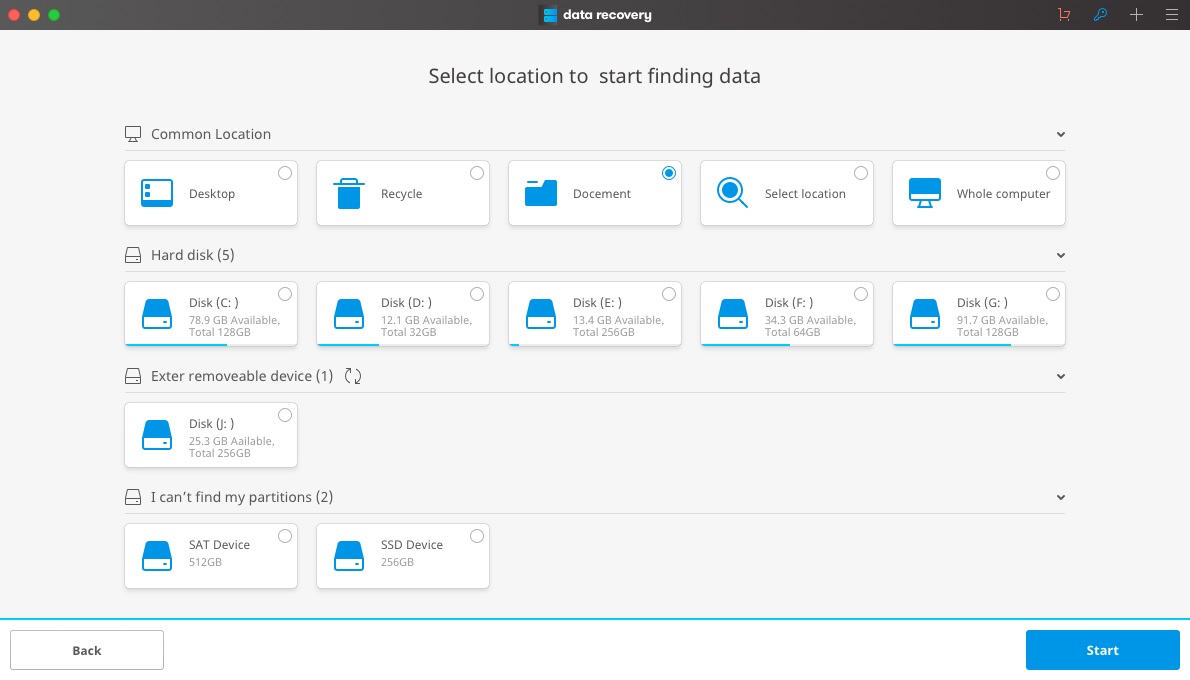
You can go to deep scan if quick scan can't find your lost files. The deep scan will deeply search the formatted files, but it will take more time.
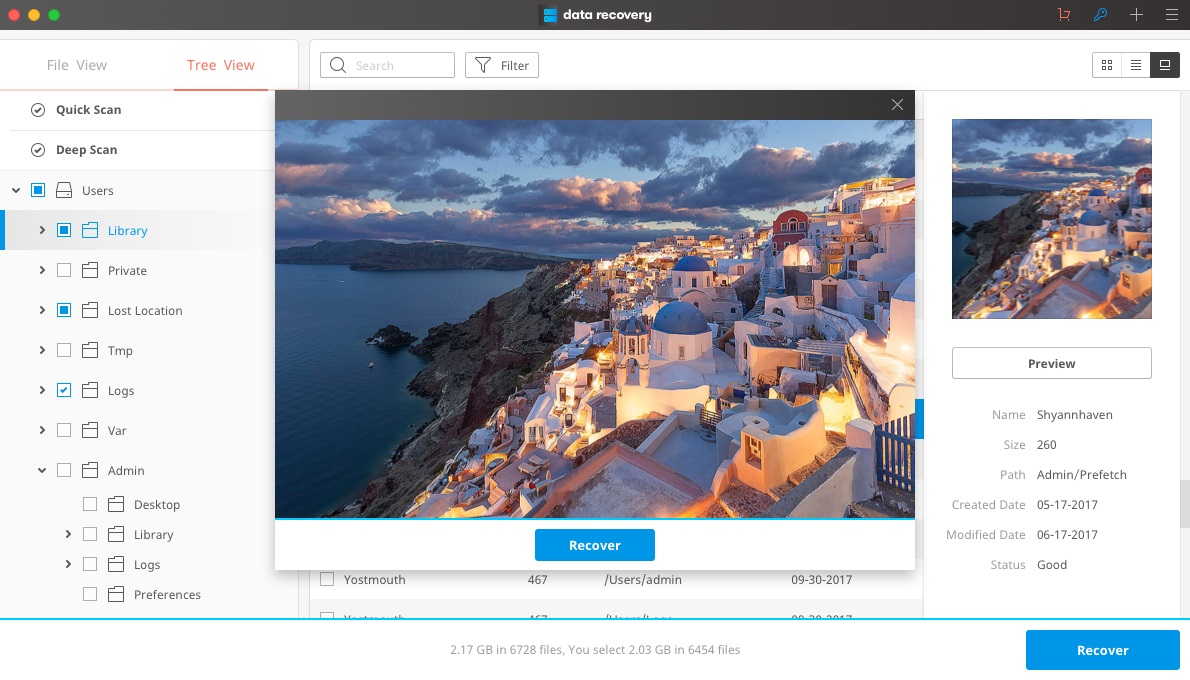
Step 3: Preview and recover data from iMac
A list of retrievable files will be presented to you. Highlight the file names to preview its content so that you know what you are retrieving from the depths of your hard drive. Check the boxes of the files you want to recover and save. Click "Recover" to save them on your local drive or an external hard drive.
If you are reading this because you need to fix your iMac now, we wish you the best of luck. If you are here to equipped yourself with knowledge, lets hope it will be useful to someone else in your circle in the future.
Komputila Reakiro
- Komputila Dosiero Reakiro +
- Reakiri datumoj de PC +
- Retrovi Mac datumoj +
- Retrovi Mac dosieron +
- Laptop Dosiero Reakiro +