Part 1 The need of having a secure password to protect Word and Excel files on your computer.
Thanks to the rapid development of the computers, people nowadays find it extremely easy to make use of the versatile programs to perform their tasks. Microsoft Office, in particular, seems to be a great choice. This marvelous and long - lasting software has been the pride of Microsoft company as it is capable of providing customers with a plenty of ways to prepare their documents. For example, with Microsoft Word you will be enabled to work with texts and writings, and Microsoft Excel will give you a hand in handling with numbers of chart or figures.
Nevertheless, it comes as a great concern to the computers' users about the security of their precious files, especially when they have to share the computers. The information leak these days has been so common that it raises a cynical attitude among the avid fans of technology.
But believe it or not, there is always a perfect solution to this nasty problem. All the Microsoft Office is built with a security feature that enables you to set up a password protecting your files.
If you are still unaware of this feature, why don't have a look at our articles? You will be provided with the latest way to protect your data from being lost in Microsoft Word and Excel.
Part 2 How to set up a password to protect Microsoft Word documents.
In this part of the article, we will show you 3 ways to apply the process of creating password to protect your Word document.
#Way 1: Note that this is only applied for computers or laptops running on Word 2010/2013.
Step 1: Open the Word file that you wish to protect it from harms.
Step 2: In the selective bars, choose the File option.
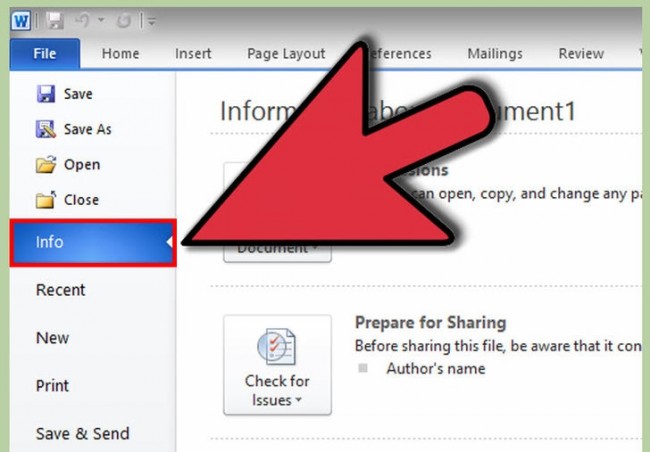
Step 3: Once you have chosen it, you will see a dropdown menu appear on the screen.
Step 4: Drag your mouse down until you have found the Info box. Click on it to begin your work.
Step 5: After the previous step, search for the Encrypt with password box. This is usually located right below the Information about document box.
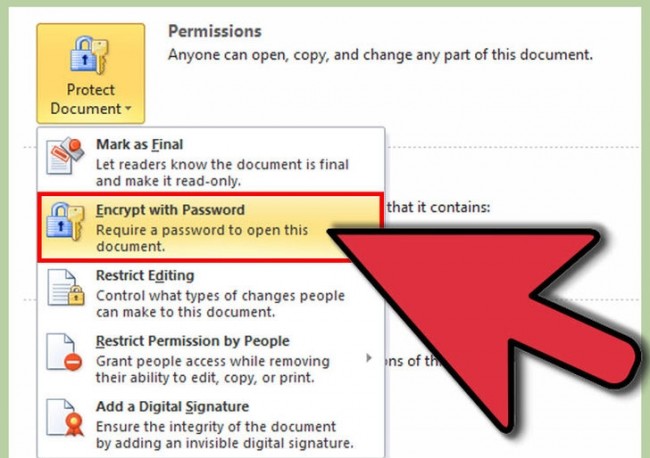
Step 6: The moment you have selected this box, you will see a new small window pop up. The blank space is here for you to type in your desired password. You are advised to choose a complicated yet familiar you. This will reduce your chance of forgetting and prevent people from knowing your password.
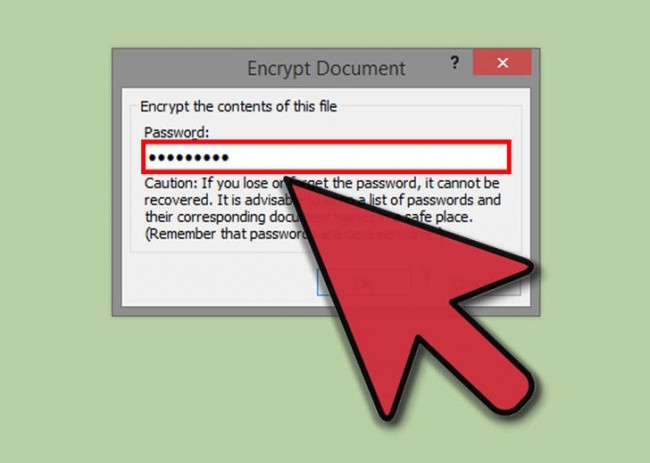
Step 7: In case you want to delete the security feature, just follow the above steps until you have reached step 6. Instead of seeing a blank space, you will end up with a space already filled by a password. Delete it and then click on the OK button. Then you will find your file getting rid of the security method.
#Way 2: Note that this is only applied for computers or laptops running on Word 2007.
Step 1: Open the Word file that you wish to set up a password.
Step 2: On the right top of the screen, you will see a Microsoft Office button in yellow. Click on it.
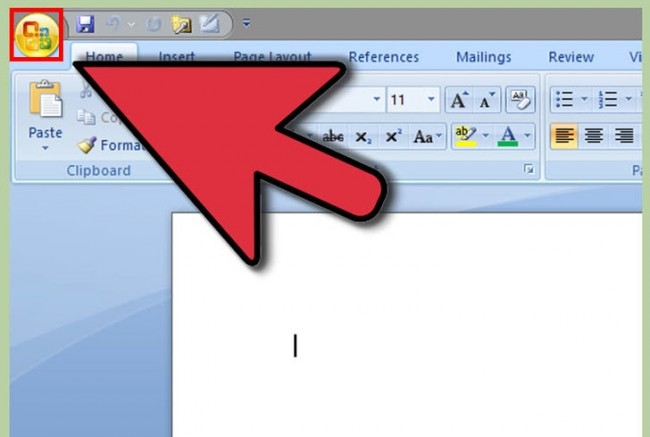
Step 3: Once you have done that, a new dropdown menu will appear.
Step 4: In the list, look for the Prepare button. Select it to begin your work.
Step 5: In the new dropdown menu, once again, drag your mouse to search for the Encrypt Document box. Select it.
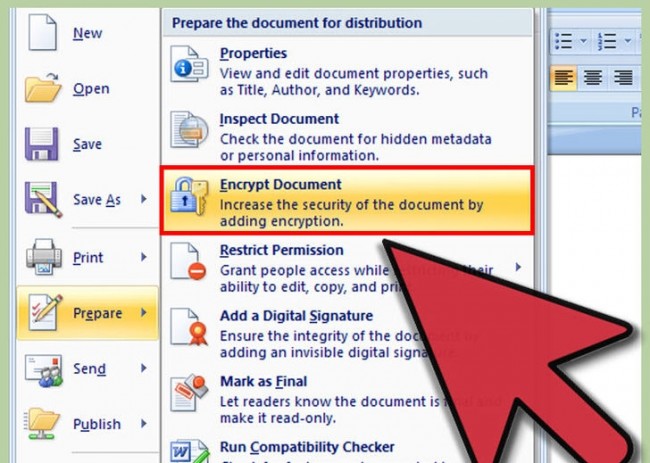
Step 6: Once you have chosen the option, a window will appear on the screen. You will see ablank space waiting for you to fill it with your password. Type in your password and then click on the OK button.
#Way 3: Note that this is only applied for computers or laptops running on Word 2003.
Step 1: Open the Word document in your computer or laptop that you wish to set up a password.
Step 2: On the selective bars, look for the Tools option. Click on it to begin your work.
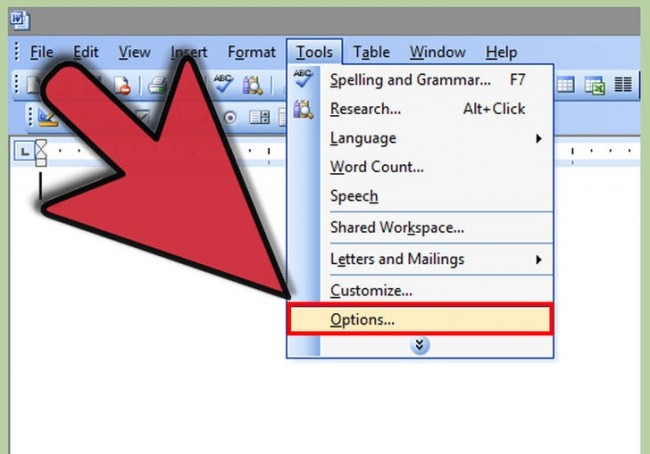
Step 3: In the dropdown menu, search for the Option bar.
Step 4: You will see a new, complicated window appear in the middle of the screen. In the options provided, search for the Security bar.
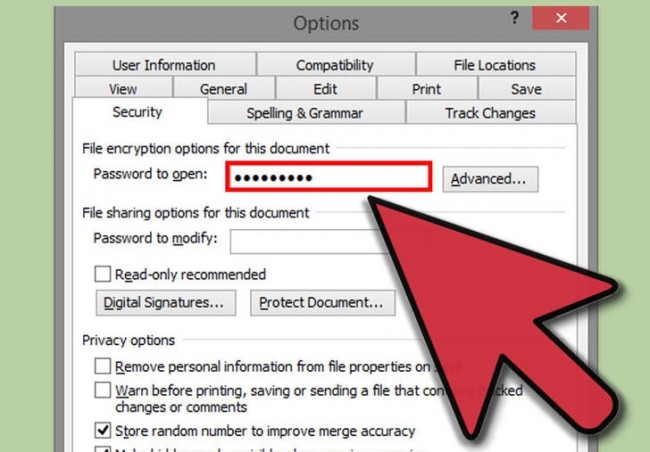
Step 5: In the first section of the menu, you will see a blank space next the line Password toopen. This password will allow to to read the file only.
Step 6: In the second section, you will also see another blank space. But on the contrary, this password will give you the permission to edit or modify the Word document.
Step 7: You are free to choose whether to enter both passwords or only a single one. After you have done with your choices, click on the OK button. It will require you to continuously enter your passwords to confirm them one last time. Then your documents will be protected.
Part 3: How to set up a password to protect Microsoft Excel documents.
In this part of the article, we will introduce you how to protect your Excel's worksheets and workbooks. Please notice that this task is only applied for Excel 2003.
Step 1: Open the Excel file that you wish to protect.
Step 2: In the selective bars, choose the Tools option.
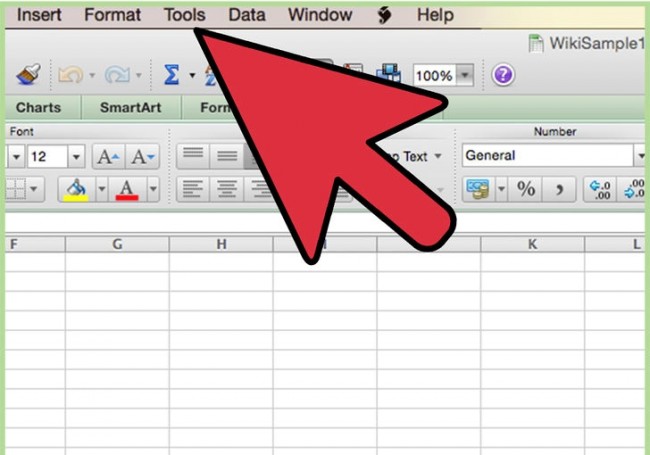
Step 3: In the dropdown menu, choose the Protection.
Step 4: If you want to protect only the current worksheet you are working on, click on Protect sheet…. But if you want to protect the whole workbook, select the Protect workbook choice.
Step 5: Type inyour desired password and then click on the OK button to confirm.
Step 6: Once you have all finished the previous steps, you are ensure that your Excel documents have been well protected.


