- How to Format a Partition on Windows 10
- How to Format a Partition on Mac OS X
- How to Recover lost files from Formatted Partition
- Video tutorial of Formatted Partition Lost File Recovery
What is a partition
Before using any disk, you first need to partition it into various sectors or partitions. These logical partitions help in managing your data on disk efficiently. You first need to partition your disk and then format it in order to store your data on it. Platforms like Windows and Mac provide inbuilt utility tools for managing and formatting the partitions, however there are also a number of external software packages too that will do the same task for you!
Part 1: When and why should we Format Partition?
Disk formatting becomes necessary when a user wants to erase all the data in that specific partition. You cannot only format the internal disk partitions but also the external devices like flash drives, HDDs etc. Formatting erases all the data on the disk and now you can use it to store other data. Some scenarios where formatting becomes mandatory include:
- Formatting becomes quite necessary when you want to erase all your private data off the disk.
- When the partition has become corrupted, formatting becomes quite essential.
- When you delete a partition, it becomes quite mandatory for you to format that partition otherwise it becomes a huge junk of unallocated memory.
- Virus attack on a partition makes it necessary for the user to format it.
Part 2: How to format a partition on Windows 10
You need to format your hard drive before you can start storing your data in it. Formatting not only erases all the data but also clears off all the junk from the partition. Disk management is a built in utility offered by Windows 10 that can help the users in creating, deleting and editing a specific partition. Here are the steps to format partition in Windows 10:
Step 1: Launch the disk management utility
You can launch the disk management utility in a number of ways. Click on start menu and then type "˜computer management'; choose "˜disk management' from the window. You can also open the disk management utility from the command prompt. Type "˜compmgmt.msc' and press enter.
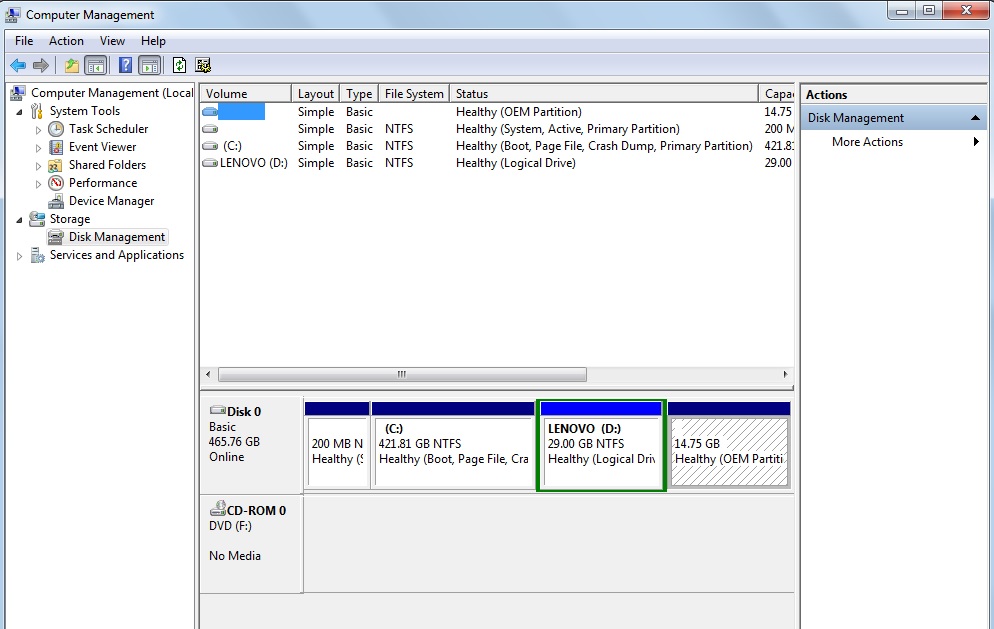
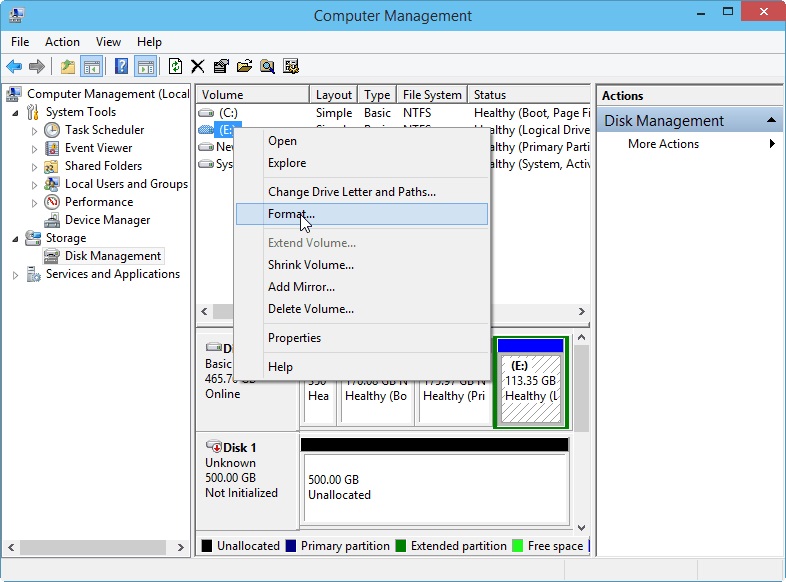
Step 2: Choose the "˜format' option
The disk management window will show all the partitions and disks on the system. Choose the partition that you want to format and right click on it to open the context menu. Choose the "˜format' option from this context menu.
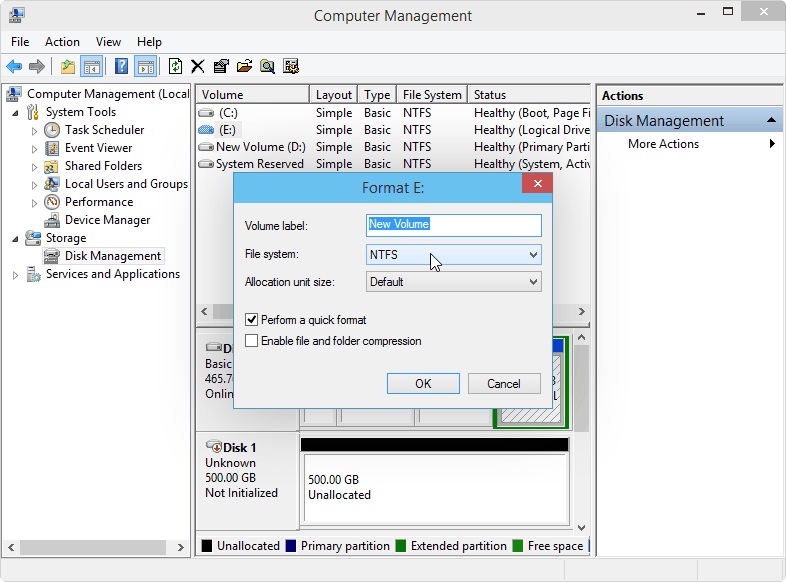
Step 3: Set the cluster type and file system type
Once you have clicked on the "˜format' option from the context menu, a pop appears that asks you to fill in the file system, the name of the volume and the cluster size. Fill in the appropriate details and click on "˜ok' button. The process of formatting will start once you have clicked on "˜ok' button.
Part 3: How to format a partition on Mac OS X?
The disk utility tool is available with Mac OS X, so if you want to format a partition in Mac, you can easily use this utility tool. Follow the steps below to format partition through disk utility tool in Mac OS X:
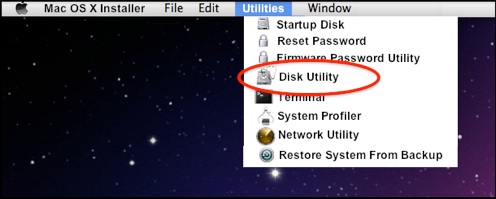
Step 1: Launch the disk utility tool
The very first step is to launch the disk utility tool from your Mac operating system. You can find the disk utility tool in the utilities menu.

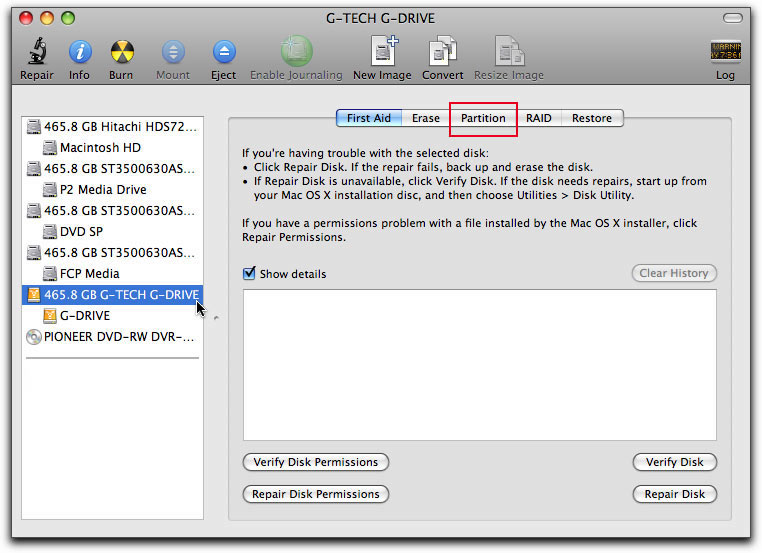
Step 2: Choose the partition that you want to format
Once you have launched the disk utility tool, the next step is to choose the drive or partition that you want to format. Selecting the drive or partition on the left pane will open the partition tab on the right side.
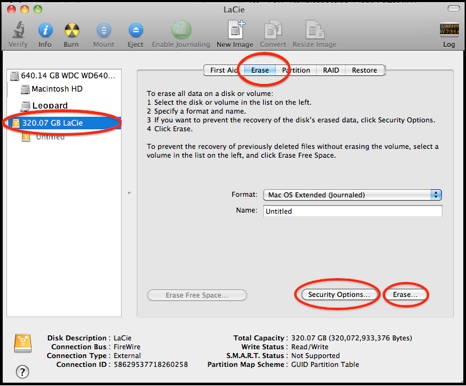
Step 3: Choose the erase tab to format
Choose the "˜erase' tab from the right pane and check the format and name of the drive you want to format. Once you are sure, click the "˜erase' button to start the formatting process.
Part 4: How to Recover lost files from Formatted Partition
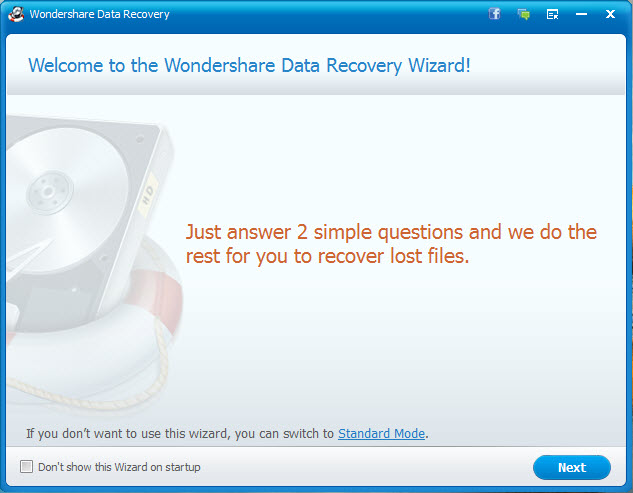
If you have formatted the partition by mistake and now you wish to get back some of the lost files, then Wondershare Data Recovery can come to your rescue! With the trust of Wondershare and amazing features, Wondershare Data Recovery has become one of the most popular data recovery software packages in the market.
Follow the steps below to recover the lost files from formatted partition in wizard mode:
Step 1: Launch Wondershare Data Recovery
The very first step is to launch the Wondershare Data Recovery software by double clicking on its icon. The software operates in two modes but if you are a beginner, then wizard mode will be the most suitable choice for you! Click on the next button in the wizard to proceed to the next step.
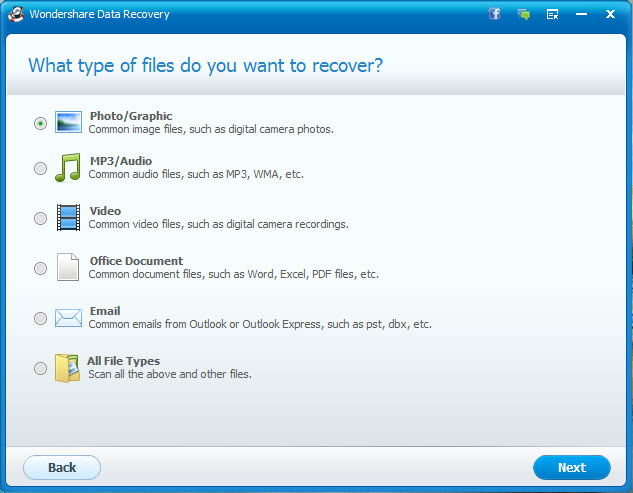
Step 2: Select file type you want to recover
Once you have clicked on the next button, the wizard will ask you about the type of file that you want to recover. You can choose a number of file type including images, folders etc. You can also choose "˜all' if you want to recover all types of files.
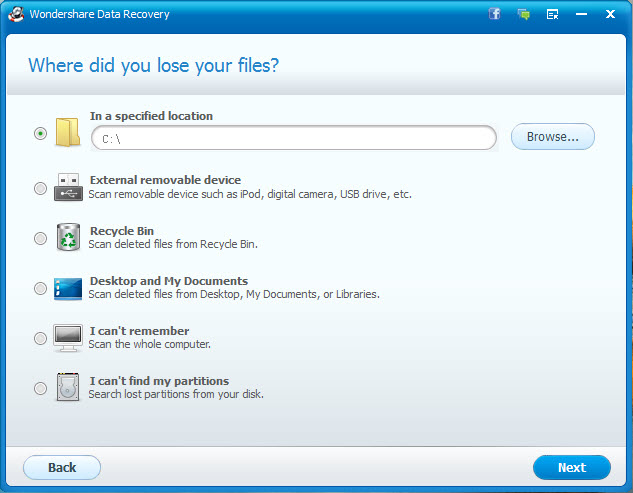
Step 3: Choose the location where you lost the files
The next question in the wizard is "where you lost the files?" You can command the software to either search the whole computer for your file or you can specify the location where the data loss occurred.
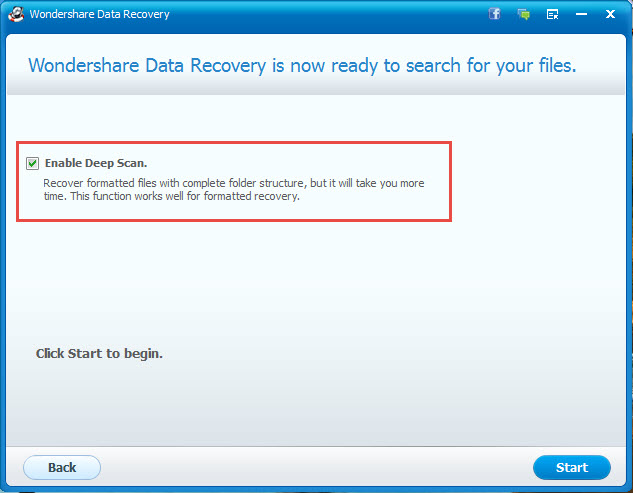
Step 4: Begin the search
Once you have chosen the file types you want to recover hard drive from where you want to recover the files, you can proceed to the next step to actually start the search process. If you want to recover files from formatted partition, then use "Deep Scan". Click on start button to start the actual recovery of lost files.
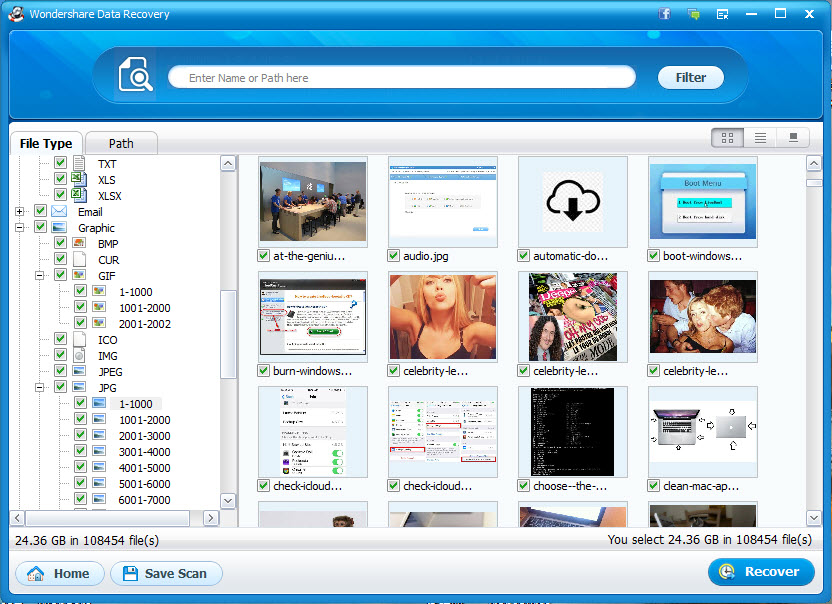
Step 5: Preview and recover files
Once you start the searching of lost files, you can preview the files as they are being recovered. Select the files that you want to recover and then click on the "˜recover' button. You can either selectively recover the files or just recover them all.