For starters or other users losing the recycle bin from the desktop may cause panic. However, it is normal to lose the recycle bin but the worst case scenario is losing valuable files. There are few common practices that can lead to lose of recycle bin and files in the recycle bin. When you need a clean desktop, you can accidentally remove the recycle bin from the desktop thus the icon will be hidden. Also when deleting some needless files from the recycle bin, you may delete some vital files only to realize late. On other occasion, a corrupt operating system can lead to lose of files in the recycle.
More importantly, the recycle bin icon can be restored back to the desktop. Moreover, the lost files from the recycle bin can still be recovered on their original form to their previous location using the correct data recovery software.
How to Make Recycle Bin Reappear on the Desktop
Your recycle bin may disappear from the desktop due to a number of the following factors. It may be due to a virus, aftermarket clean tool may remove it or accidental deletion. Encouragingly; you can recover it to its original location. There are a number steps to follow to make it reappear again.
Step 1
Click on the start menu on you task bar
This is the basic steps for individuals with windows vista.
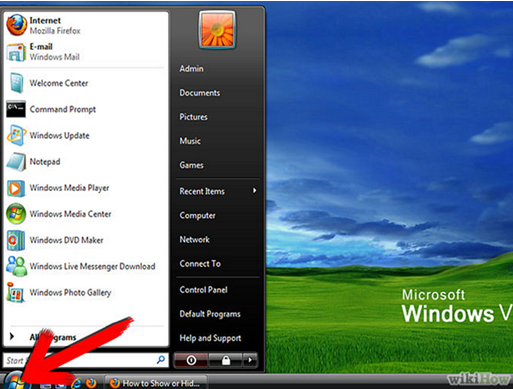
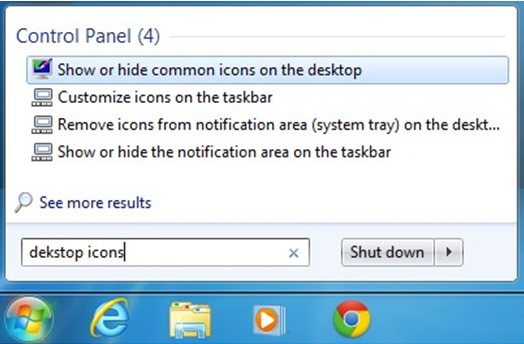
For individuals with Windows 8 and Windows 7, you will be required to search for desktop icons then go ahead to select show or hide common icons on the desktop. There after you will continue with step 4
Step2
Select control panel
There is a control panel on your right, click on it and wait for other features to be displayed. You will see like this appears.

Step 3
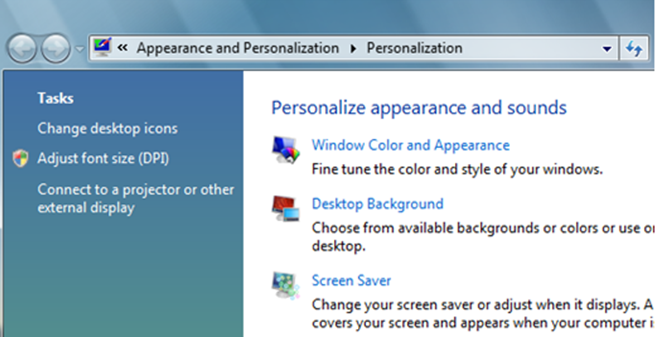
Select personalization
From appearance and personalization, go to personalize on your right. You will screen like this appear on your computer.
Step 4
Go to change desktop icons
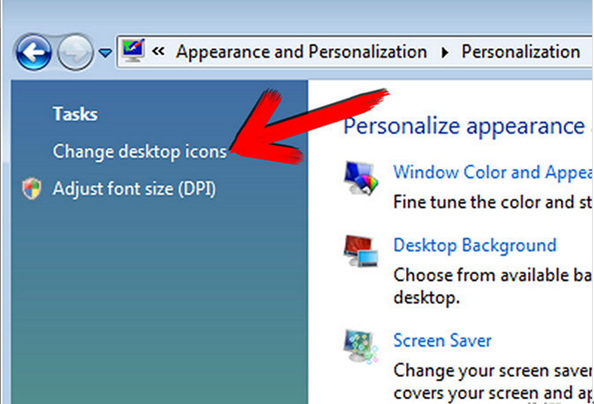
A dialogue box will appear on your right hand side. You will see a change desktop icon appear, click on it.
Step 5
Select recycle bin
Go to change desktop icon box then select the recycle bin to add to your desktop of your choice. Here you will see a screen like this
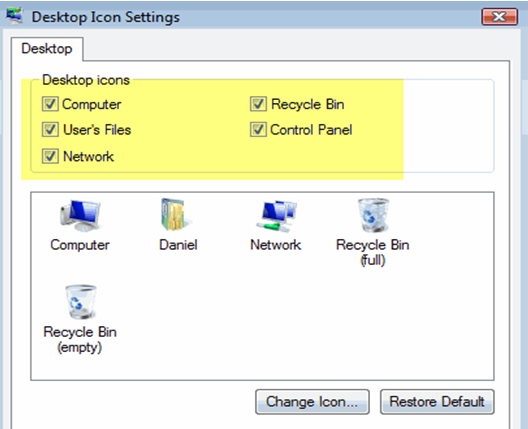
You can either choose a full recycle bin or an empty one. There is also a change recycle bin icon dialogue box just in case you don’t like the previous icon.
How to Recovers Deleted Files from the Recycle Bin
If you accidentally deleted vital files, there is not cause for alarm. The recycle bin still has your files therefore; it is easy to restore them with window. But if you went further to empty the recycle bin, you will not find your files in the recycle bin thus you will need file recovery software to get them back. Here are simple steps to retrieve deleted files from the recycle in window
First, double click on the recycle bin icon to open. Then identify and select all the files you need them restored. After that, select the appropriate place where you want your restored files to be located. Right click on the location then click restore. Relax, you files can now be restored and you will find them in the location you selected. The time taken to restore files depends on your computer speed and the size of files being restored.
The Best Data Recovery Tool-Wondershare Data recovery
Individuals and even companies dread losing vital data. Currently, most information is stored in the computers however; such information is not usually backed up. Thus the loss of such important data can cause serious panic among the users. To deal with such kind of situations, a number of data recovery tools have been invented. If you are looking for the most efficient and high quality software, look no more.
Wondershare data recovery tool is an awesome tool for retrieve any kind of lost data. From secondary storage devices( including and not limited to hard drives, flash drives, SD card) to mobile phones to digital cameras. This software is user friendly and beginners or starters can use it without difficulty. It also possesses a good interface making it easier for the user to navigate whenever need.
This recovery software is designed to serve all users taking into account the computer skills. In that there are two types of recovery utility; wizard and the standard mode. Wizard mode is specifically designed for individuals without much computer skills to recover lost data. The standard mode is meant for advanced users. It contains four recovery modules; lost file recovery, resume recovery, partition recovery and raw file recovery.

- Recover lost or deleted files, photos, audio, music, emails from any storage device effectively, safely and completely.
- Supports data recovery from recycle bin, hard drive, memory card, flash drive, digital camera and camcorders.
- Supports to recover data for sudden deletion, formatting, hard drive corruption, virus attack, system crash under different situations.
- Preview before recovery allows you to make a selective recovery.
- Supported OS: Windows 10/8/7/XP/Vista, Mac OS X (Mac OS X 10.6, 10.7 and 10.8, 10.9, 10.10 Yosemite, 10.10, 10.11 El Capitan, 10.12 Sierra) on iMac, MacBook, Mac Pro etc.
How to Retrieve Data Using Wondershare File Recovery Software
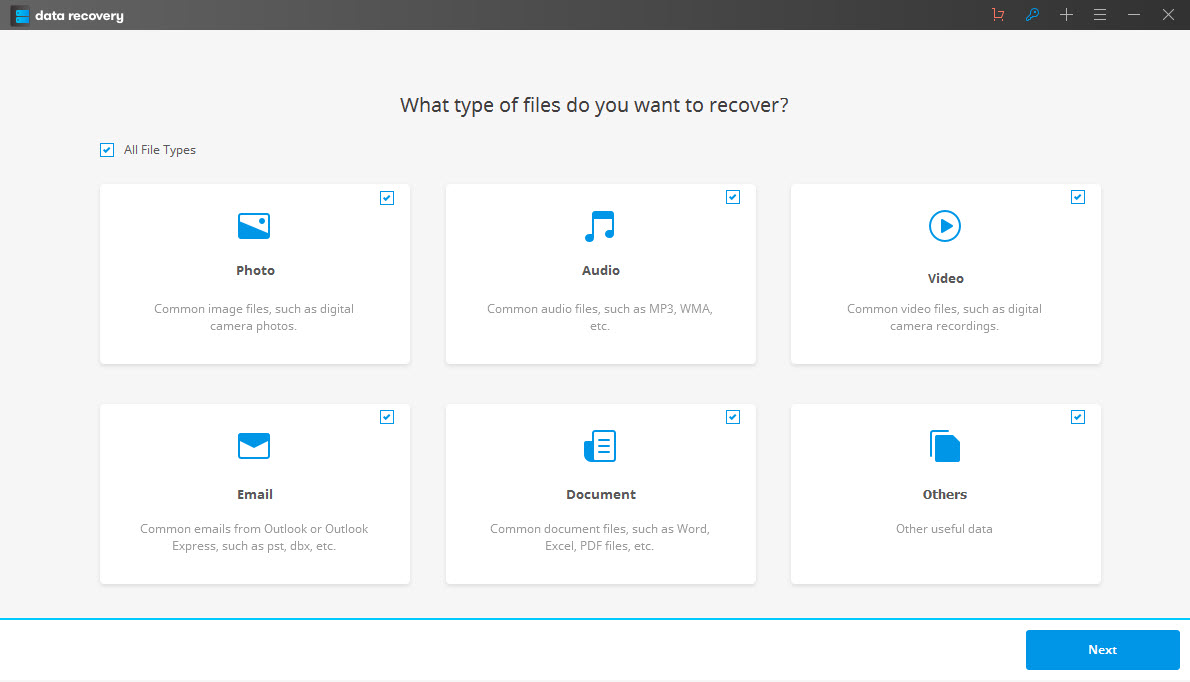
Step 1: Choose the file types you want to recover
Here you are required to select the types of files you want to be retrieved be it photo, emails, audios or video. You can also select all option, if want all the lost files to be recovered. Come to terms with what you want to proceed to the following step.
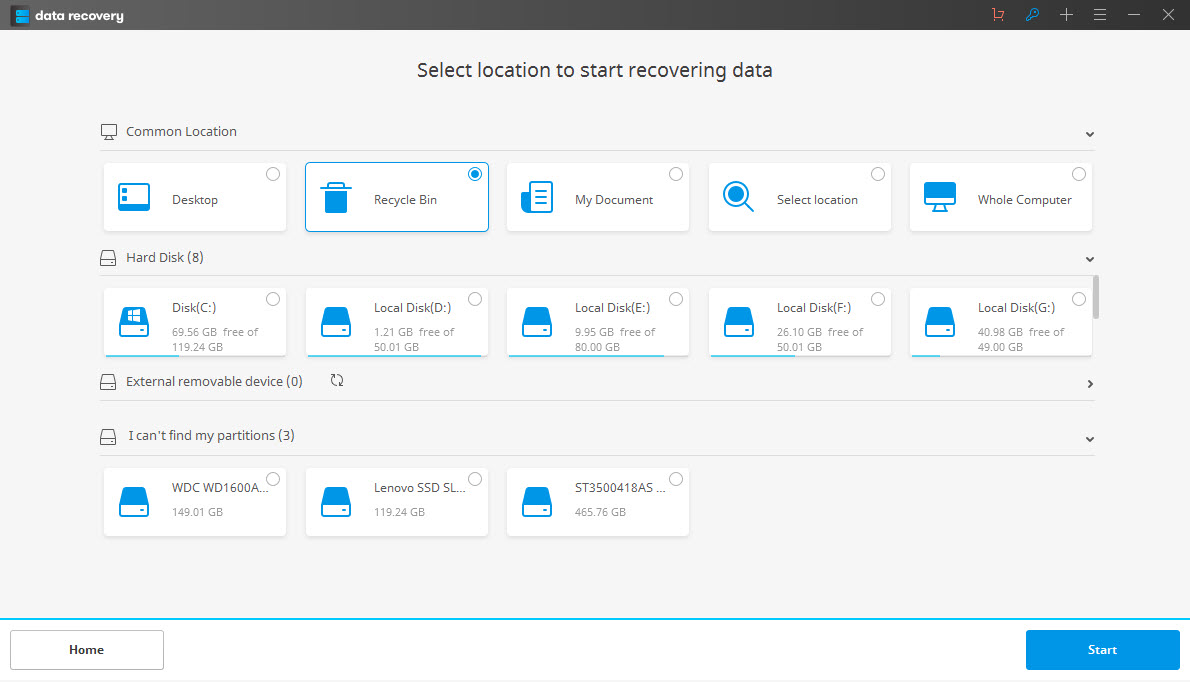
Step 2: Choose the location where the deleted files where initially deleted
Select the recycle bin if you emptied the recycle. If you are not certain where data loss occurred, you can also choose the computer as the location to enable the recovery tool to retrieve your files.
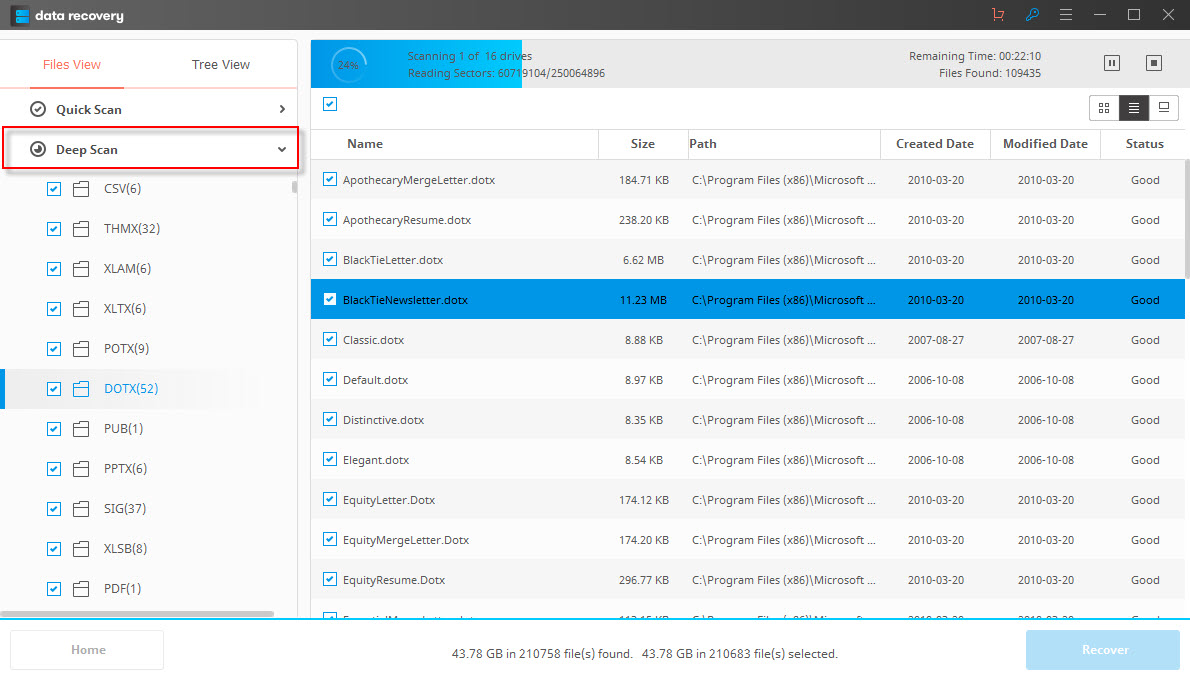
Step 3: To to deep scan
Enable deep scan to give the recovery tool the highest possible chance of recovering all your lost files. The process may take several minutes given the number of files required to be scanned.
Step 4: Recover deleted files
After scanning is completed, go through all the recovered types of files. You can preview the recovered files and click "Recover" to start recovery.
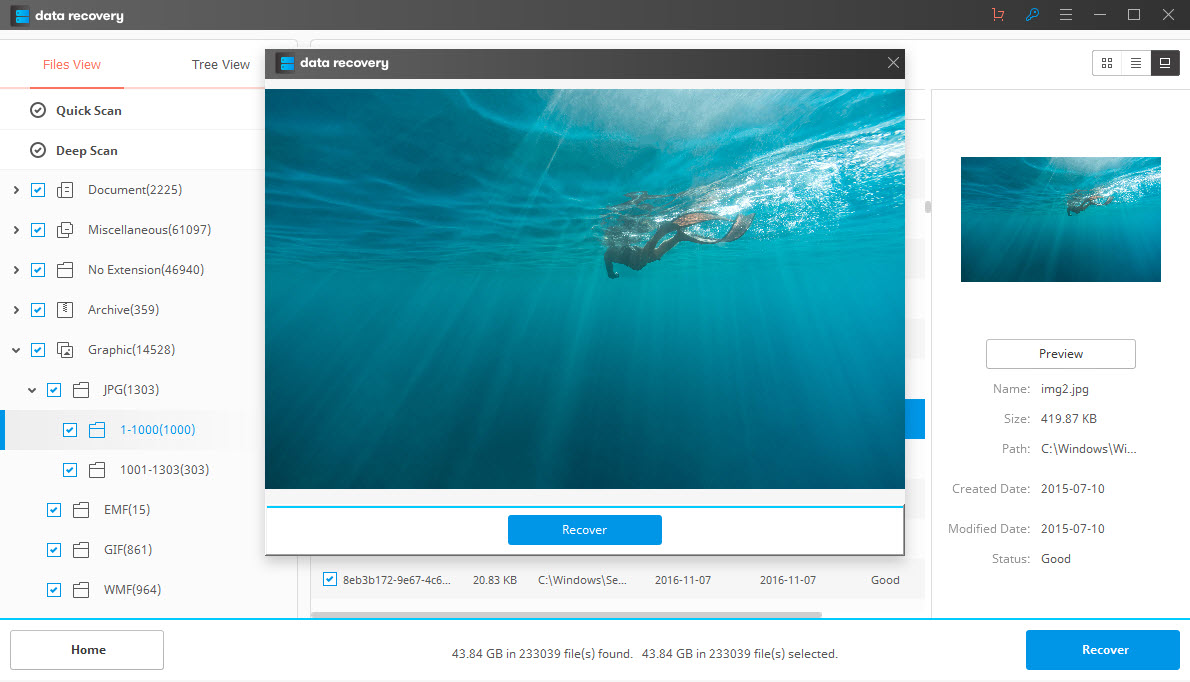
Note: Save all recovered files to another safe storage device, it will avoid files overwritten.