- Things we need to do before a Flash Drive Partition
- Partition a Flash Drive by using the Following Steps
Part-1: The Need to Partition a Flash Drive:
It is important to know how to partition a flash drive as the knowledge can come in handy to divide your flash drive into numerous sections in order to diversify your storage. This helps you to organize your files in a better manner along with the installation of advanced files. People who partition flash drive, usually, opt for this option because they want to have two operating systems in the same machine. However, Windows Operating Systems do not support the partitioning of the flash drives by default. This is because flash drives are classified as removable drives, and not fixed drives. For the ones who really need to partition a flash drive within their Windows Operating System, there is a method that involves several steps, before you start to partition a flash drive; there are certain things you need to make sure of.
Part-2: Things we need to do before a Flash Drive Partition
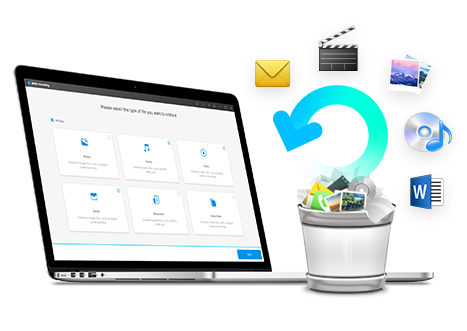
Before you partition a flash drive, there are certain steps that must be necessarily followed. These steps ensure that you don't lose your precious data during the partition. It is important to note that when you partition a flash drive, you'll lose all your important data along with other files stored on the drive. Therefore, backup your data by moving it to some other system. When you finish the partition, you can use the flash drive to store it. However, if you ever forget to backup your data and lose it later, or accidentally delete the data without having a back up, you can use the Wondershare Data Recovery software to restore the data. After restoration, you can then carry out the data backup.
- Recover lost or deleted files, photos, audio, music, emails from any storage device effectively, safely and completely.
- Supports data recovery from recycle bin, hard drive, memory card, flash drive, digital camera and camcorders.
- Supports to recover data for sudden deletion, formatting, hard drive corruption, virus attack, system crash under different situations.
- Preview before recovery allows you to make a selective recovery.
- Supported OS: Windows 10/8/7/XP/Vista, Mac OS X (Mac OS X 10.6, 10.7 and 10.8, 10.9, 10.10 Yosemite, 10.10, 10.11 El Capitan, 10.12 Sierra) on iMac, MacBook, Mac Pro etc.
Here, let's a take a look at how Wondershare Data Recovery works:
You can restore data by conducting the Flash Drive Repair process. This involves the installation of data recovery software. Wondershare Data Recovery software has been in use for quite a while and offers users the opportunity to restore their crucial data. Here, we take a look at how it's done.
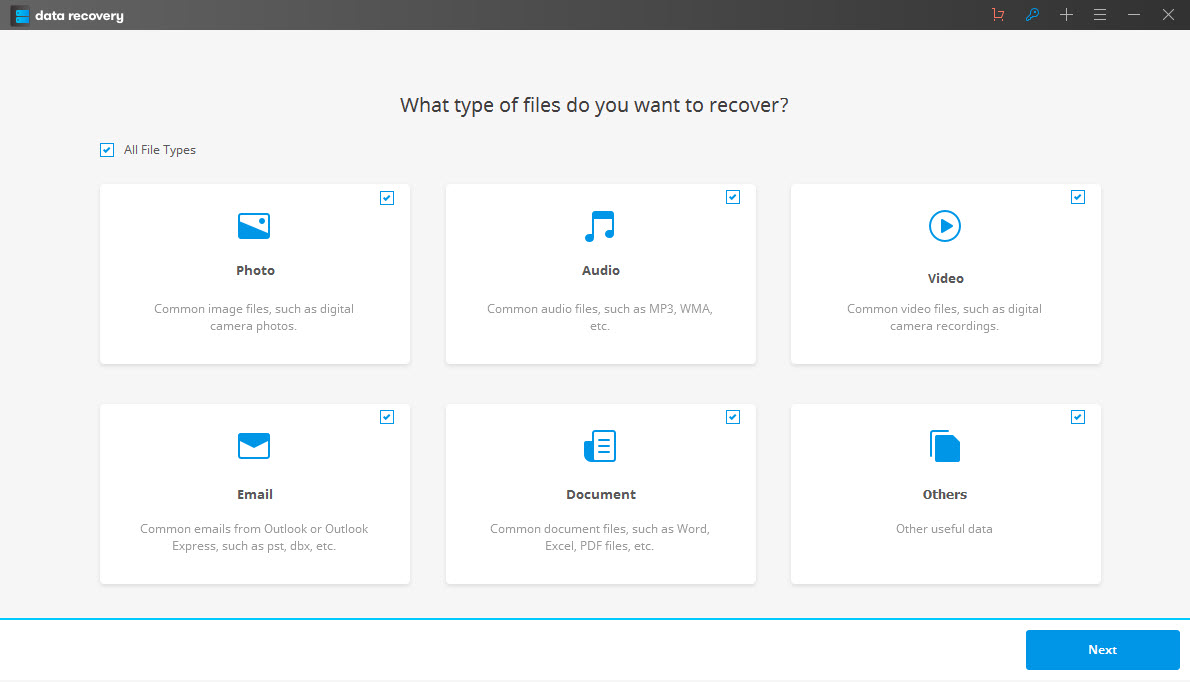
- Select the file type you want to recover from pen drive. You can select the option "All File Types" to start.
- Select your pen drive and click "Start" to scanning lost files

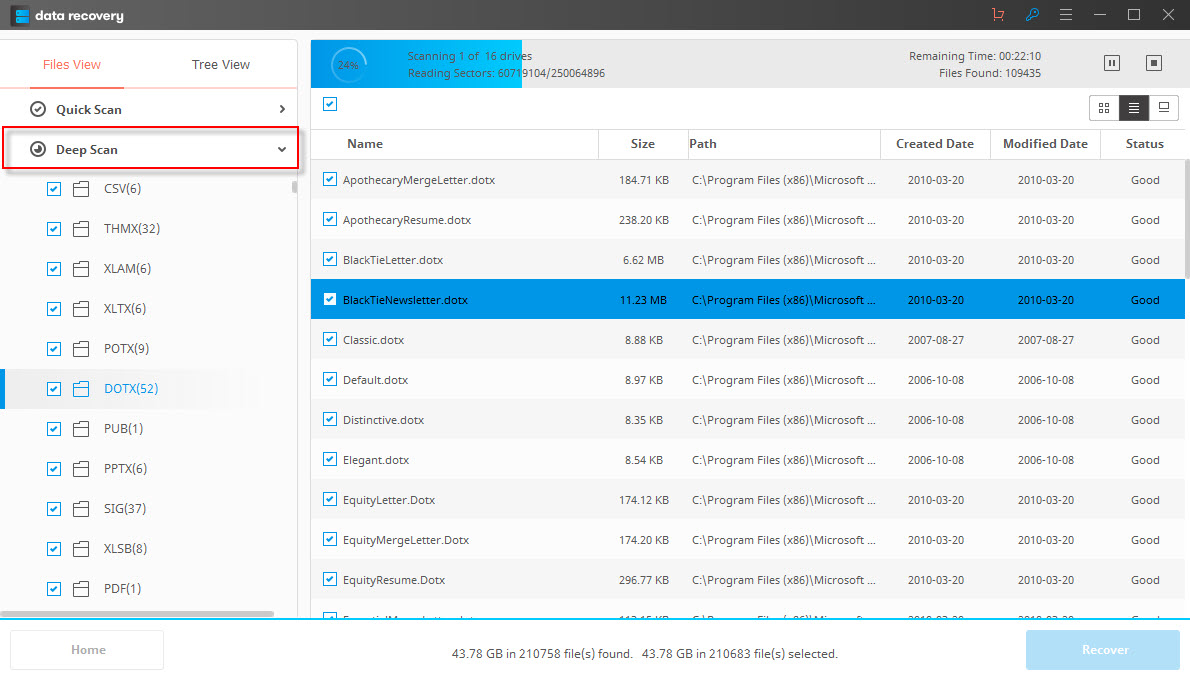
- You can go to deep scan if quick scan can't get your lost files, the deep scan will deeply search more file from pen drive.
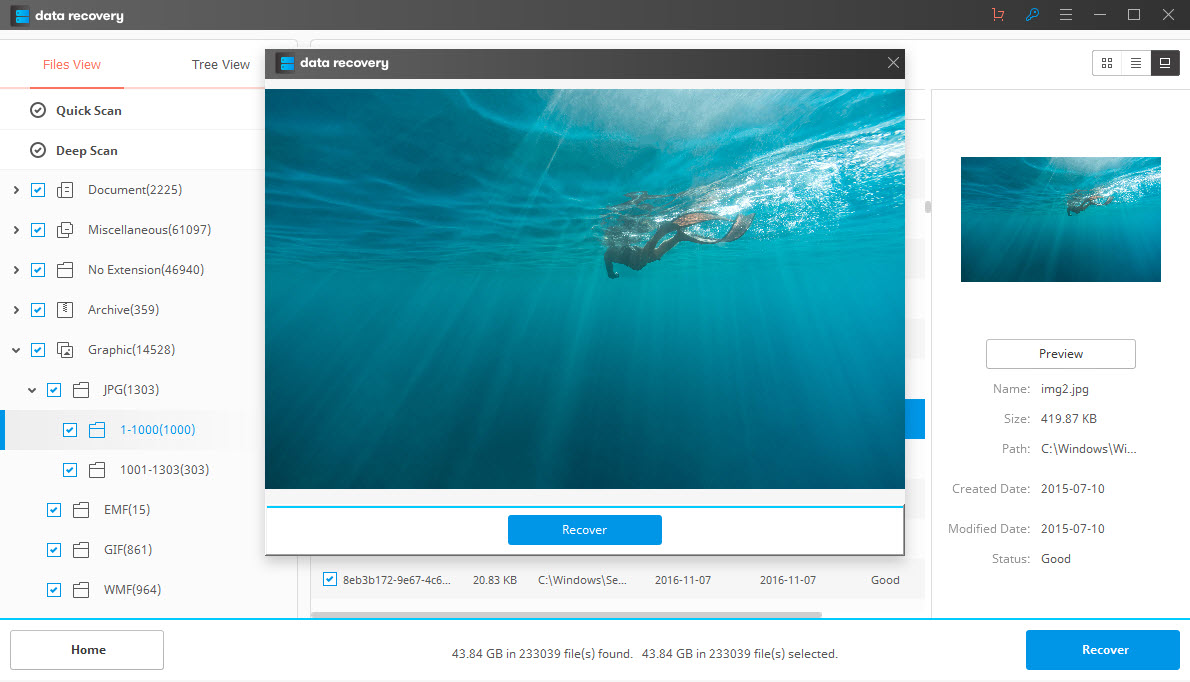
- After deep scan, you can preview and check the desired files and click in order to recover lost data.
Now that you have taken the backup of the restored data, you can partition a flash drive by following the steps listed in the next part.
Part-3: Partition a Flash Drive by using the Following Steps:
- Begin by downloading and installing the Lexar's Bootit Software program. The origins of this program lie in helping the users who had Lexar's USB to format it completely. Fortunately, the application can be put to good use when one wants to partition a flash drive as it allows the user to reclassify the flash drive as fixed instead of removable. In order to partition a flash drive, it is necessary for the user to have the drive in use to be classified as fixed. This is where the software program is so important.
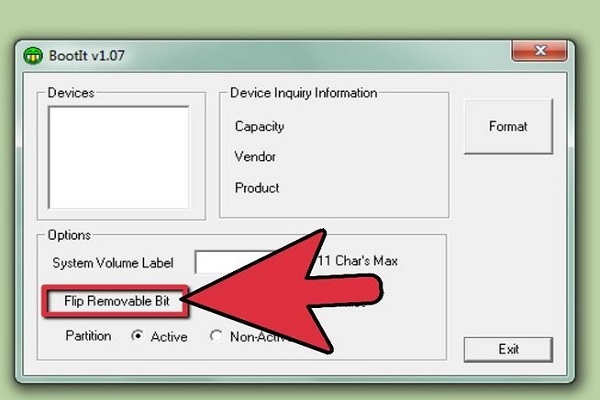
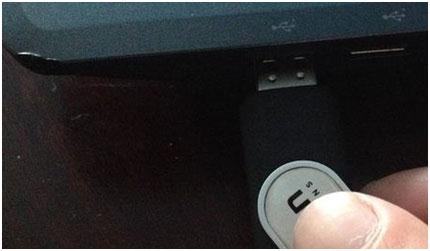
- Now that your software application is installed, it's time to reclassify your flash drive. Start by inserting the USB Drive into your computer. Open the application interface. The top-left window of the application's main screen would give you a list of removable drives on your computer. Select the drive you have inserted and click on the button which reads "˜Flip Removable Bit'. This allows you to classify you inserted flash drive as fixed drive and not removable drive. Therefore, it becomes easy to partition a flash drive using Window's default disk utility function. However, you would need to eject the flash drive and insert it again for the system to register this change.
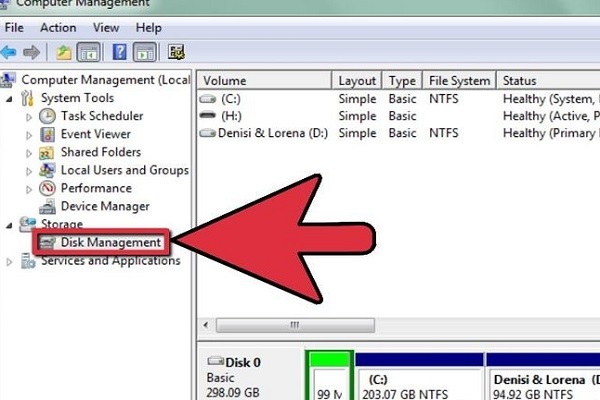
- Start with the disk management utility in Windows. Begin by clicking on "˜Start' and then follow it up by clicking on "˜Control Panel'. You need to find "˜Performance and Maintenance' in the window that appears next. Follow it up clicking on "˜Administrative Tools,' "˜Computer Management', and eventually, "˜Disk Management.'
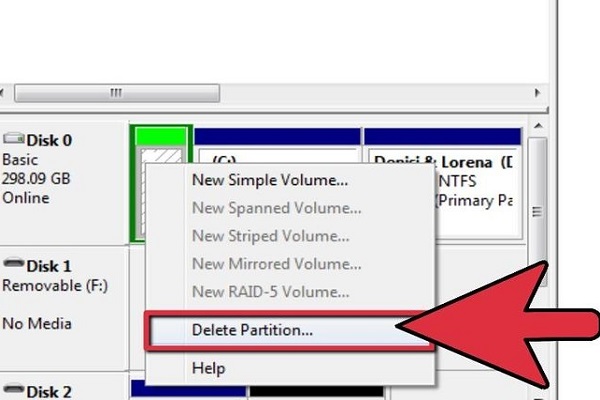
- This one is an important step because it shall require you to remove the existing partition on the flash drive. Deleting all the volume on the drive would amount to losing all your data. However, if you have taken a data backup, you don't have to worry. In the "˜Disk Management' window, you must right-click on the USB drive and click on "˜delete partition'. This removes each and every file on the drive. When learning to partition a flash drive, this one is a critical step.
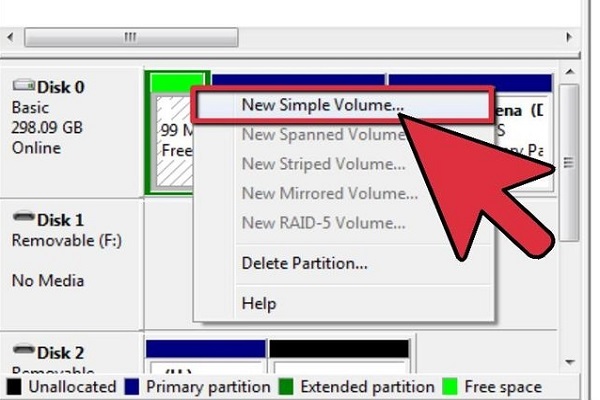
- Now that your flash drive is empty, you can create the new partitions as per your convenience. Begin with right click on the flash drive, and start with "˜new partition'. Then, you would be required to follow the instructions that partition a flash drive into numerous sections. After one is done making the partitions, close the "˜Disk Management' window. Ejection of the flash drive can be done now.
Part-4: Testing if the Partition of a Flash Drive is successful or not:
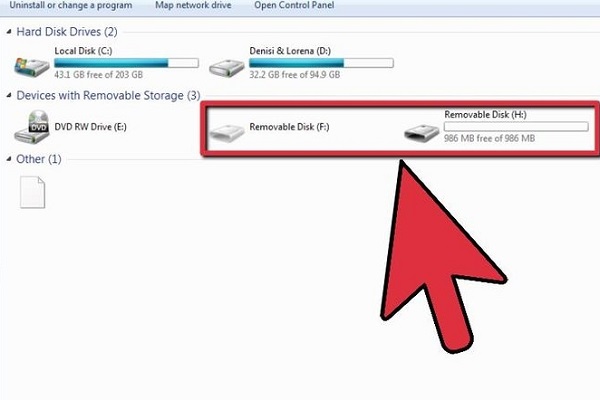
Now that the process to partition a flash drive is complete, you must check if the partition is done correctly or not. This can be done by inserting the flash drive in the same or on a different computer. Open windows explorer once you have inserted the flash drive. If the partition is successful, you should be able to see multiple drive letters corresponding to the flash drive; with each partition have its own assigned letter.
If the corresponding letters do not appear, you may have to carry out the above steps again. Make sure that your flash drive does not carry any corrupted files as they may hamper the formatting process, which in turn does not allow you to partition a flash drive.
Flash Drive
- Choose your Flash Drive+
- Fix Flash Drive+