There are several ways to make sure that a flash or the thumb drive is not only partitioned, but is and organized properly. It is to be noted that there are several advantages that are associated with the partitioning of a thumb drive. For example, some advanced applications that require USB boot can be installed in separate sections of the USB. It is also to be noted that when a flash drive is partitioned, professionals that use this device to install windows and to make sure that the USB system boot is selected can install two different compressed versions of the OS.
This will make sure that the one as per the choice of their client is installed which is otherwise not possible if the USB is not partitioned. It is also a good idea to make sure that the USB partitions are named and the folders that are associated with a particular name are not only stored, but they are also accessed with ease. It is, therefore, an advent fact that partitioning a flash drive is important for those who require this tech piece to work for them in multiple ways.
1Things to Do before Partitioning a Flash Drive
A user should make sure that a couple of things are not only done before the USB is partitioned and that the best practices are also followed. This way, if there is a mistake, the previous version can be easily reverted to. In order to do this, users should follow the advice below:
1. Data Backup
This is one of the first steps that should be taken to make sure that partitioning is done without any issues or problems. The data present on the USB drive should be backed up to make sure that the user wont lose all their data if the partition fails. It is also to be noted that doing this will also allow the user to revert to the previous version quickly.
2. Partition Software to Partition a Flash Drive
Good partitioning software should be used to make sure that the partitioning done in the best manner. The user should make sure that the support of the program as well as the features that have been embedded are the best. If the features are in line with the requirements, then the software will work the best and do the work for the user easily.
2Step by Step Tutorial on How to Partition a Flash Drive
The tutorial below is state of the art and features the tools that are known to do the work without any issues. It is also to be noted that the user should make sure that the steps that are mentioned here are followed exactly and in the same order in which they appear. It is also to be noted that the user should ensure that the tools that are required are installed beforehand to make sure that the process is completed correctly without losing any data and or effort. The process is not time consuming and the user should simply follow the steps that are mentioned below:
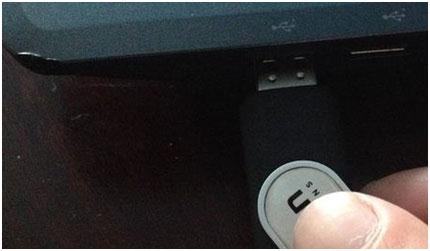
1. The data should be backed up and the USB drive should be inserted into the port:
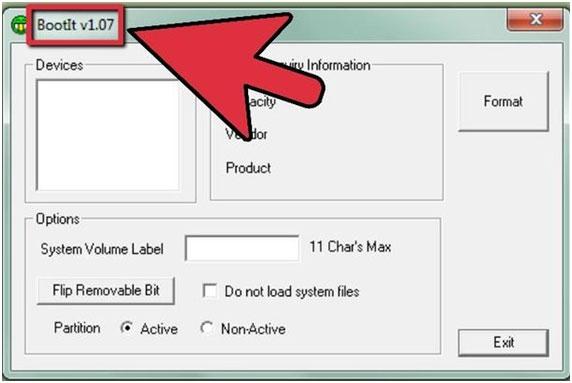
2. The Lexar bootit program must be installed to proceed:
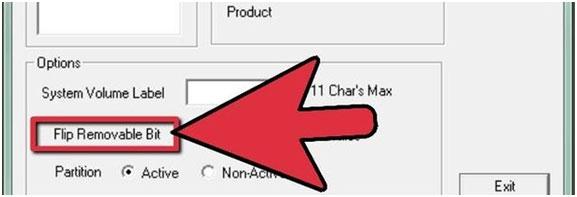
3. The USB should be named or marked as removable:
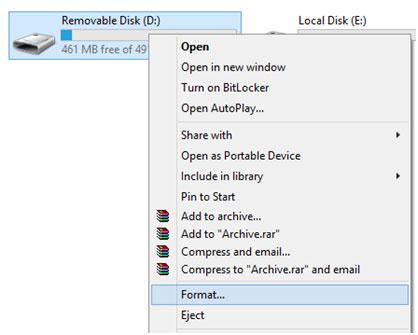
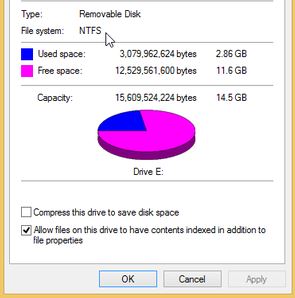
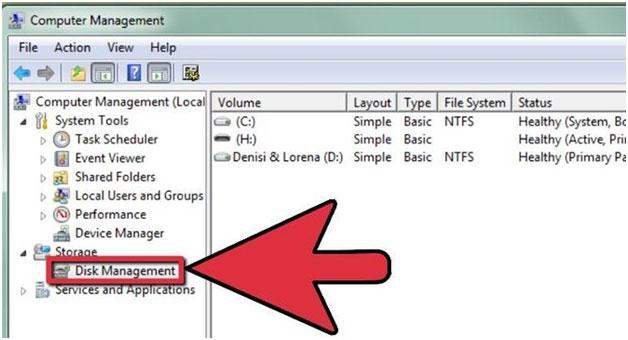
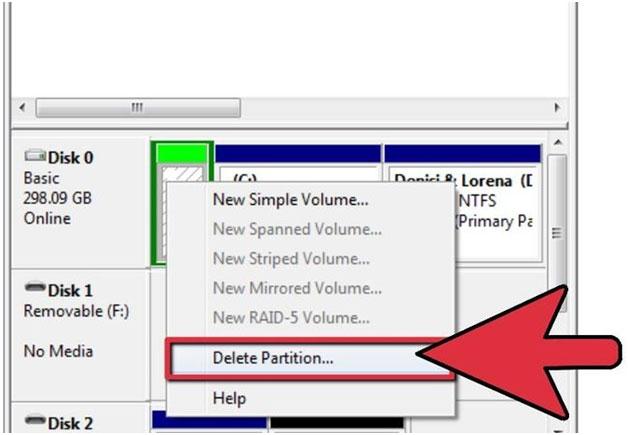
4. The user should then make sure that the Disk Management is opened on windows. It is done by right clicking the My Computer icon and then selecting Manage:
5. The current partition must be deleted in full:
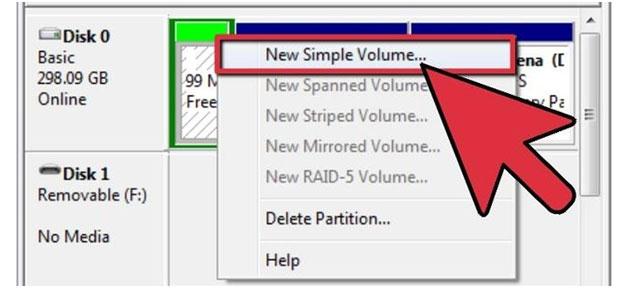
6. The user should then make sure that the new partition is created and that the process is completely finished.
3How to Check if the Flash Drive Partition is Successful and What to Do When It Fails
Successful Partition a Flash Drive
- The user should make sure that the best process are carried out in this regard. This can be done by making sure that the USB drive is inserted again after the partition process has been finished. It will now show multiple drives on the My Computer panel.
- It is also to be noted that the user should make sure that data can be transferred to and from the drive. If the partition was done correctly, then the user can being to use their drive.
Partition a Flash Drive Failed
In case the partition has failed, the user will not be able to carry out any of the tasks that have been mentioned above. The following steps can fix this problem:
- The Lexar bootit must be updated as per the instructions on to the website and the user should try again to partition the drive.
- The drive should be reinserted and the process should be carried out once again.
- The user should also make sure that there are no viruses or malware on the drive.
If you lost the data of your flash drive unfortunately, don't worry! You still have the chance to get lost data back. To recovery files from USB flash drive, you can have a try the following tool.
- Recover lost or deleted files, photos, audio, music, emails from any storage device effectively, safely and completely.
- Supports data recovery from recycle bin, hard drive, memory card, flash drive, digital camera and camcorders.
- Supports to recover data for sudden deletion, formatting, hard drive corruption, virus attack, system crash under different situations.
- Preview before recovery allows you to make a selective recovery.
- Supported OS: Windows 10/8/7/XP/Vista, Mac OS X (Mac OS X 10.6, 10.7 and 10.8, 10.9, 10.10 Yosemite, 10.10, 10.11 El Capitan, 10.12 Sierra) on iMac, MacBook, Mac Pro etc.
फ्लैश ड्राइव पुन:
- फ्लैश ड्राइव विशेषताहरु +
- विशेष फ्लैश ड्राइव +
- समस्या र समस्या निवारण +
- फ्लैश ड्राइव फाइलहरू +
- फ्लैश ड्राइव डाटा +
- Recvoer फ्लैश ड्राइव +
-
- Sandisk फ्लैश ड्राइव रिकभरी
- Emtec फ्लैश ड्राइव रिकभरी
- शब्दशः फ्लैश ड्राइव रिकभरी
- Centon इलेक्ट्रनिक्स datastick रिकभरी
- Garmin युएसबी कमिला छडी रिकभरी
- Imation युएसबी रिकभरी
- Pexagon फ्लैश ड्राइव रिकभरी
- महत्वपूर्ण USB फ्लैश ड्राइव रिकभरी
- MEMOREX फ्लैश ड्राइव रिकभरी
- Dane Elec फ्लैश ड्राइव रिकभरी
- Mimoco USB फ्लैश ड्राइव रिकभरी
- ब्रान्ड फ्लैश ड्राइव +
- पुन: प्राप्त फ्लैश ड्राइव +