When the computer came from the manufacturer, the default number of partition in the hard drive is one. However, a lot of computer users nowadays prefer to have more than one partition on their hard drive. The reason for this is so that they can protect important data, especially when their hard drive gets attacked by a virus.
Partitioning a hard drive, especially with Windows 10, is essential. After all, it is also through partitioning the hard drive that one can organize the files better. Through partitioning, one can easily separate the storage for the program files, data files, and operating system. It should promote more efficiency in computer processing too.
How to Format a Hard Drive in Windows 10
In the case when your hard drive gets attacked by a virus, one of the steps you will take is to format your partitions. For formatting the hard drive, you can actually use the built-in tool of your computer which is called the Disk Management. Here are some steps to take when formatting the hard drive in Windows 10:
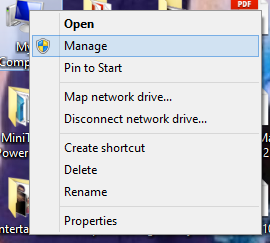
- Right-click MY COMPUTER and select the MANAGE option that shows up to get the Computer Management interface. Another method you can use to run the Computer Management interface to open the command line (usually with the shortcut WINDOWS + R) and the input "diskmgmt.msc". It is also possible to do it through clicking the START menu, typing "cmd" to open the command line, and the inputting "compmgmt.msc".
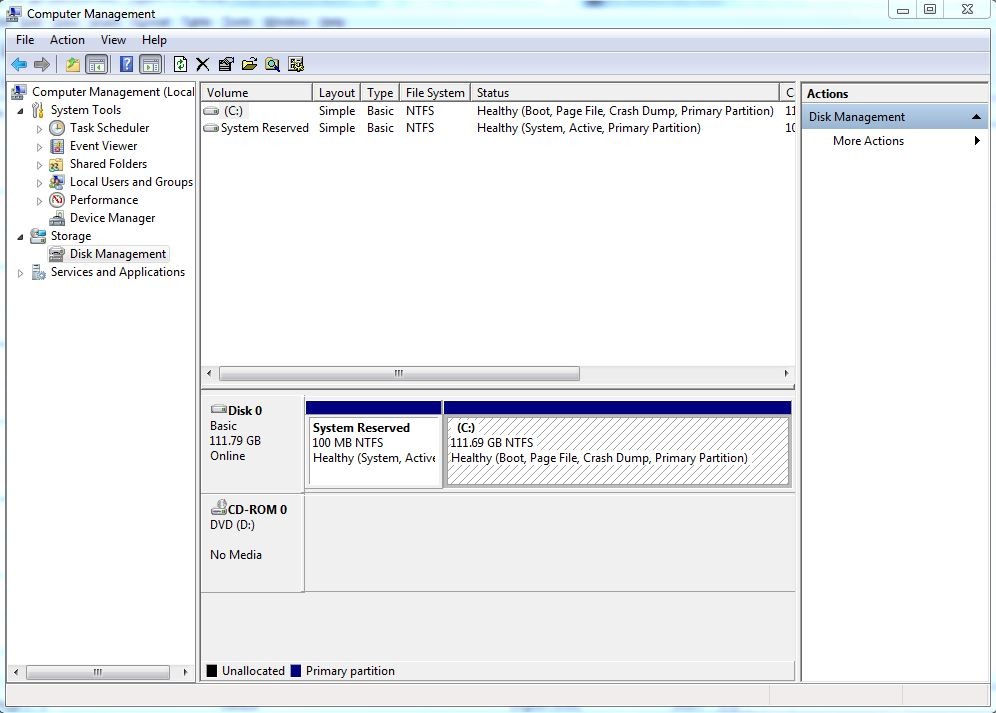
- Once the Computer Management interface shows up, you will need to click on the Disk Management option you can find on the left side pane. Doing this will load relevant information on the center pane.
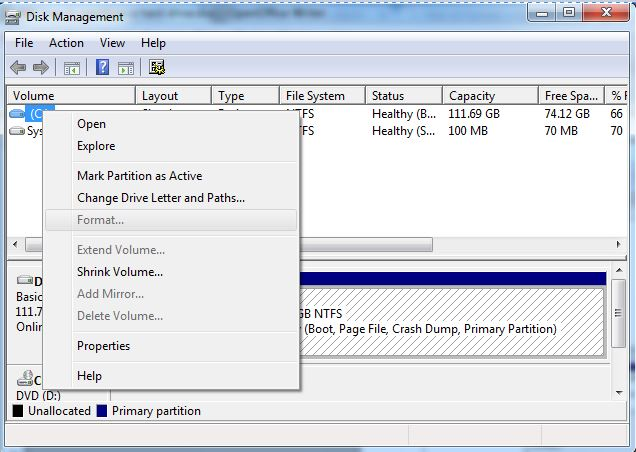
- Right-click the partition you want to format and then choose the option FORMAT.
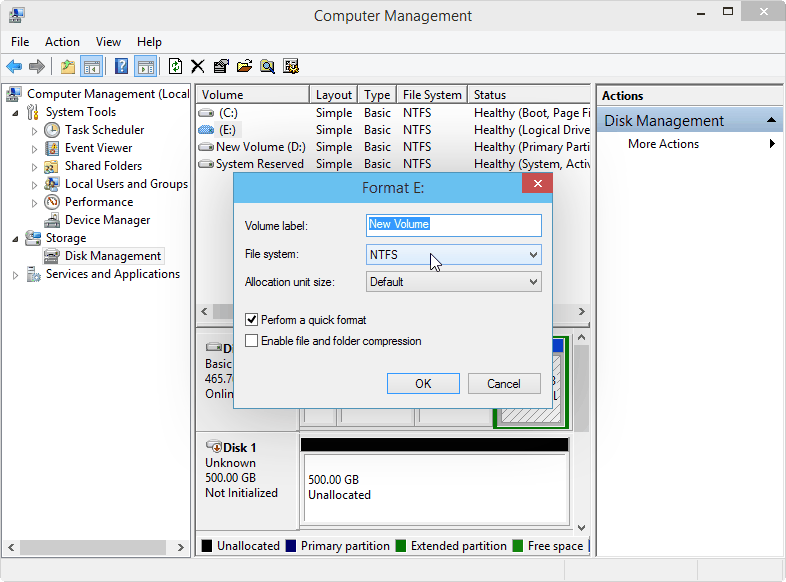
- A pop-up window will appear. Set the file system as well as the cluster size for it. Proceed to the next step by clicking OK.
How to Partition a Hard Drive Using Windows 10
There are many ways on how you can create a partition with Windows 10. At times, a user may find it easier to create the partition with the help of partitioning wizards. However, some users will opt to use the built-in tool of the operating system to do the task.
The steps for creating the partition using the built-in tool should not be that difficult to follow. Here is the step-by-step tutorial on how one can create partitions in Windows 10 with the use of the built-in tool called Disk Management:
- To create partitions, start by opening the Disk Management tool. Commonly, this tool is opened by just right-clicking on the My Computer icon on the desktop and selecting Manage. Some people prefer to use the command line either by inputting "compmgmt.msc" or "dksmgmt.msc". Any of these options can pull up the Disk Management interface.

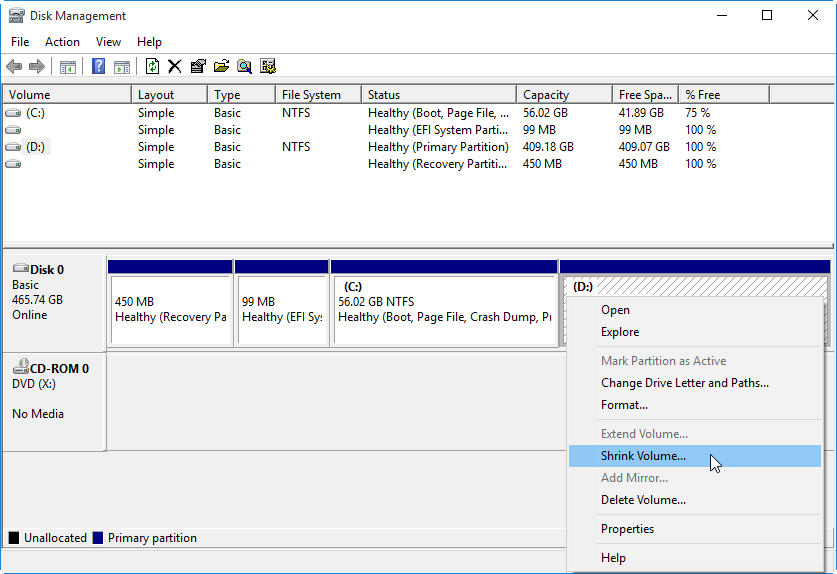
- Select the disk that you want to partition. To do so, you just have to right-click on the partition. There will be a set of options you can choose from. For this, you have to choose Shrink Volume.
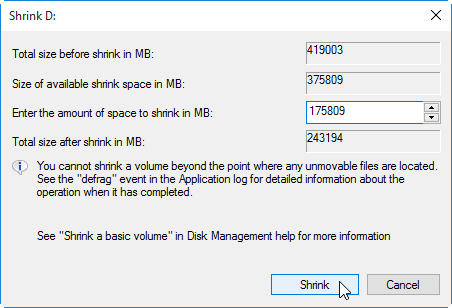
- There will be a pop-up window that will appear. In this pop-up window, it is up to you to modify the space you want to shrink. Once done, you have to click on the Shrink button located at the lower right of the pop-up window.
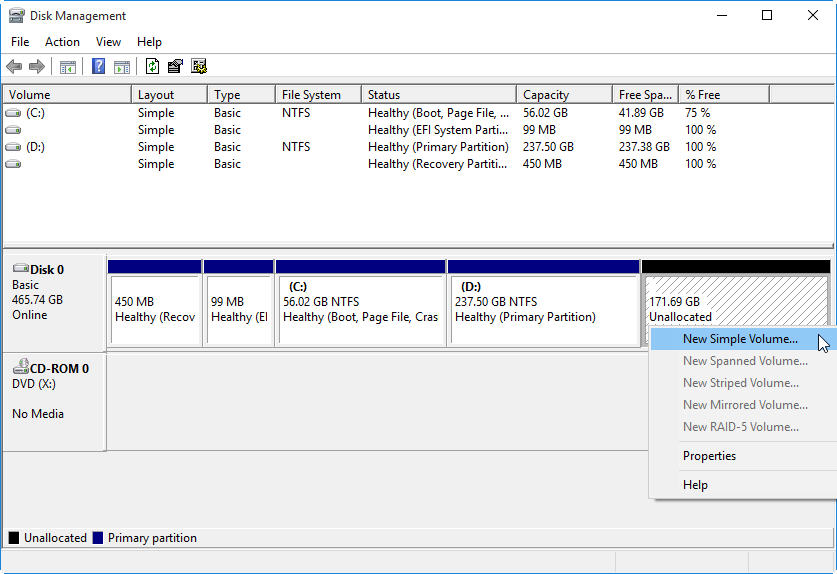
- Once you have finished with the previous step, you can notice an unallocated space in the disk that you have chosen. You have to right-click on this unallocated space. A set of options will then be shown to you, by which you will be choosing New Simple Volume. You just have to follow the wizard to be able to format as well as partition the new volume.
Just follow these steps and you are done with creating partitions on the hard drive of your Windows 10!
On a side note though, you have to know one thing about the unallocated space you see during Step 4. The unallocated space can actually only be used for the creation of a new partition and not for anything else. This means that you will not be able to use the unallocated space to extend volume. To prove this point, you will most likely see the option of Extend Volume in the Disk Management tool greyed out once you click on the unallocated space.
Tools That Make the Partition Easier
Any partitioning wizard should make it easier for the user to partition the hard drive in Windows 10. Remember that the Disk Management tool, the built-in tool of the operating system, may not be enough to do the partition tasks you want to do. Knowing what other programs can be used to make the partition easier is a good thing.
Here are some of the recommended software that a user should download in order to have an easier time with the partitioning task:
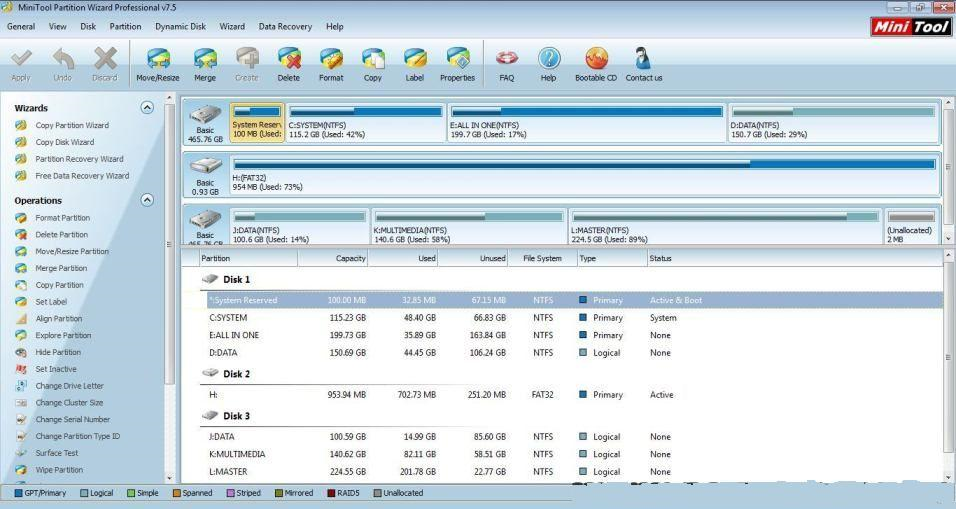
A. Minitool Partition Wizard
This is a partition wizard that can help with managing the partitions you currently have in your disk. Not only managing, it is also useful in editing, resizing, creating, formatting, and deleting partitions. The powerful functions of the Minitool Partition Wizard actually allows disk usage optimization. It also offers high-level of protection to keep your data safe.
B. Wondershare Data Recovery
The Wondershare Data Recovery program can help users recover any data lost from partitioning or formatting the hard disk. It is especially handy when you are suffering from heavy data loss. Wondershare Data Recovery is considered a safe and reliable way of retrieving lost emails, documents, videos, and photos on your computer.
- Recover lost or deleted files, photos, audio, music, emails from any storage device effectively, safely and completely.
- Supports data recovery from recycle bin, hard drive, memory card, flash drive, digital camera and camcorders.
- Supports to recover data for sudden deletion, formatting, hard drive corruption, virus attack, system crash under different situations.
- Preview before recovery allows you to make a selective recovery.
- Supported OS: Windows 10/8/7/XP/Vista, Mac OS X (Mac OS X 10.6, 10.7 and 10.8, 10.9, 10.10 Yosemite, 10.10, 10.11 El Capitan, 10.12 Sierra) on iMac, MacBook, Mac Pro etc.
Things to Take Care of When Partitioning Your Hard Drive
When you are partitioning your hard drive, there are several things that you will have to take care of to ensure that nothing goes wrong. First of all, make sure that you are partitioning the right disk before you go ahead with the step-by-step tutorial. See to it that if you want to partition then disk C, you should really be clicking on disk C. To avoid data losses, it is also a good idea to back up your important files such as photos, videos, documents, and other digital files before you do any partitioning on your Windows 10 computer.
د تجزیې
- بیرته د تجزیې دوتنه +
-
- ورک د تجزیې راوګرځوئاو
- له خام د تجزیې دوتنې السته
- سامسونگ راستنولو د تجزیې
- USB د تجزیې Recvoery
- د تجزیې د افغاني
- Vista د تجزیې Recvoery
- بیرته ړنګ Partiton
- د تجزیې لېږدونه
- د ورايټۍ د تجزیې
- ناسم تجزیې جدول
- بیلتون د تجزیې
- په Win10 ړنګ د تجزیې
- په Win10 / د میک تجزیې جوړول
- راوګرځوئاو د تجزیې د دوتنې
- Mac د تجزیې راستنول
- په Win10 د تجزیې لېږدونه
- GPT د تجزیې
- بڼول تجزیه د معلوماتو د السته